By Cheryl Whalen, Head Gardener
Each year I look forward to Valentine’s Day with eagerness and anticipation. It’s not the chocolate and candy hearts I crave but something much more satisfying. That mid-February love-filled holiday marks the start of the Tuberous Begonia growing season here at the farm. And tending these Begonia beauties is what I love!
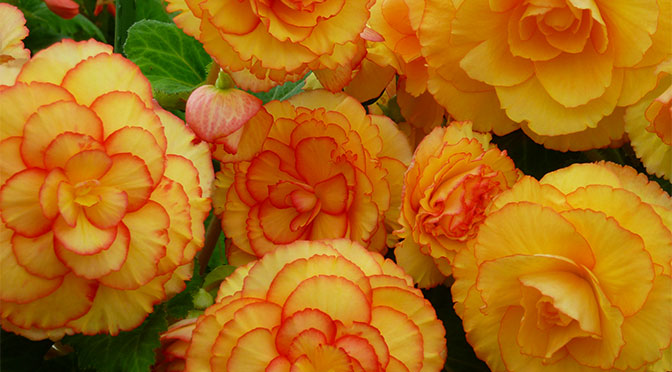
Each summer, our display of Tuberous Begonias attracts visitors from hundreds of miles. Our collection of the English-bred Blackmore & Langdon Tuberous Begonias showcases more than 70 varieties of this fantastic strain of Begonias. Perhaps it’s a rare sight to see on this side of “the pond” . . . so many B&L varieties all together composing a colorful symphony for the eyes.
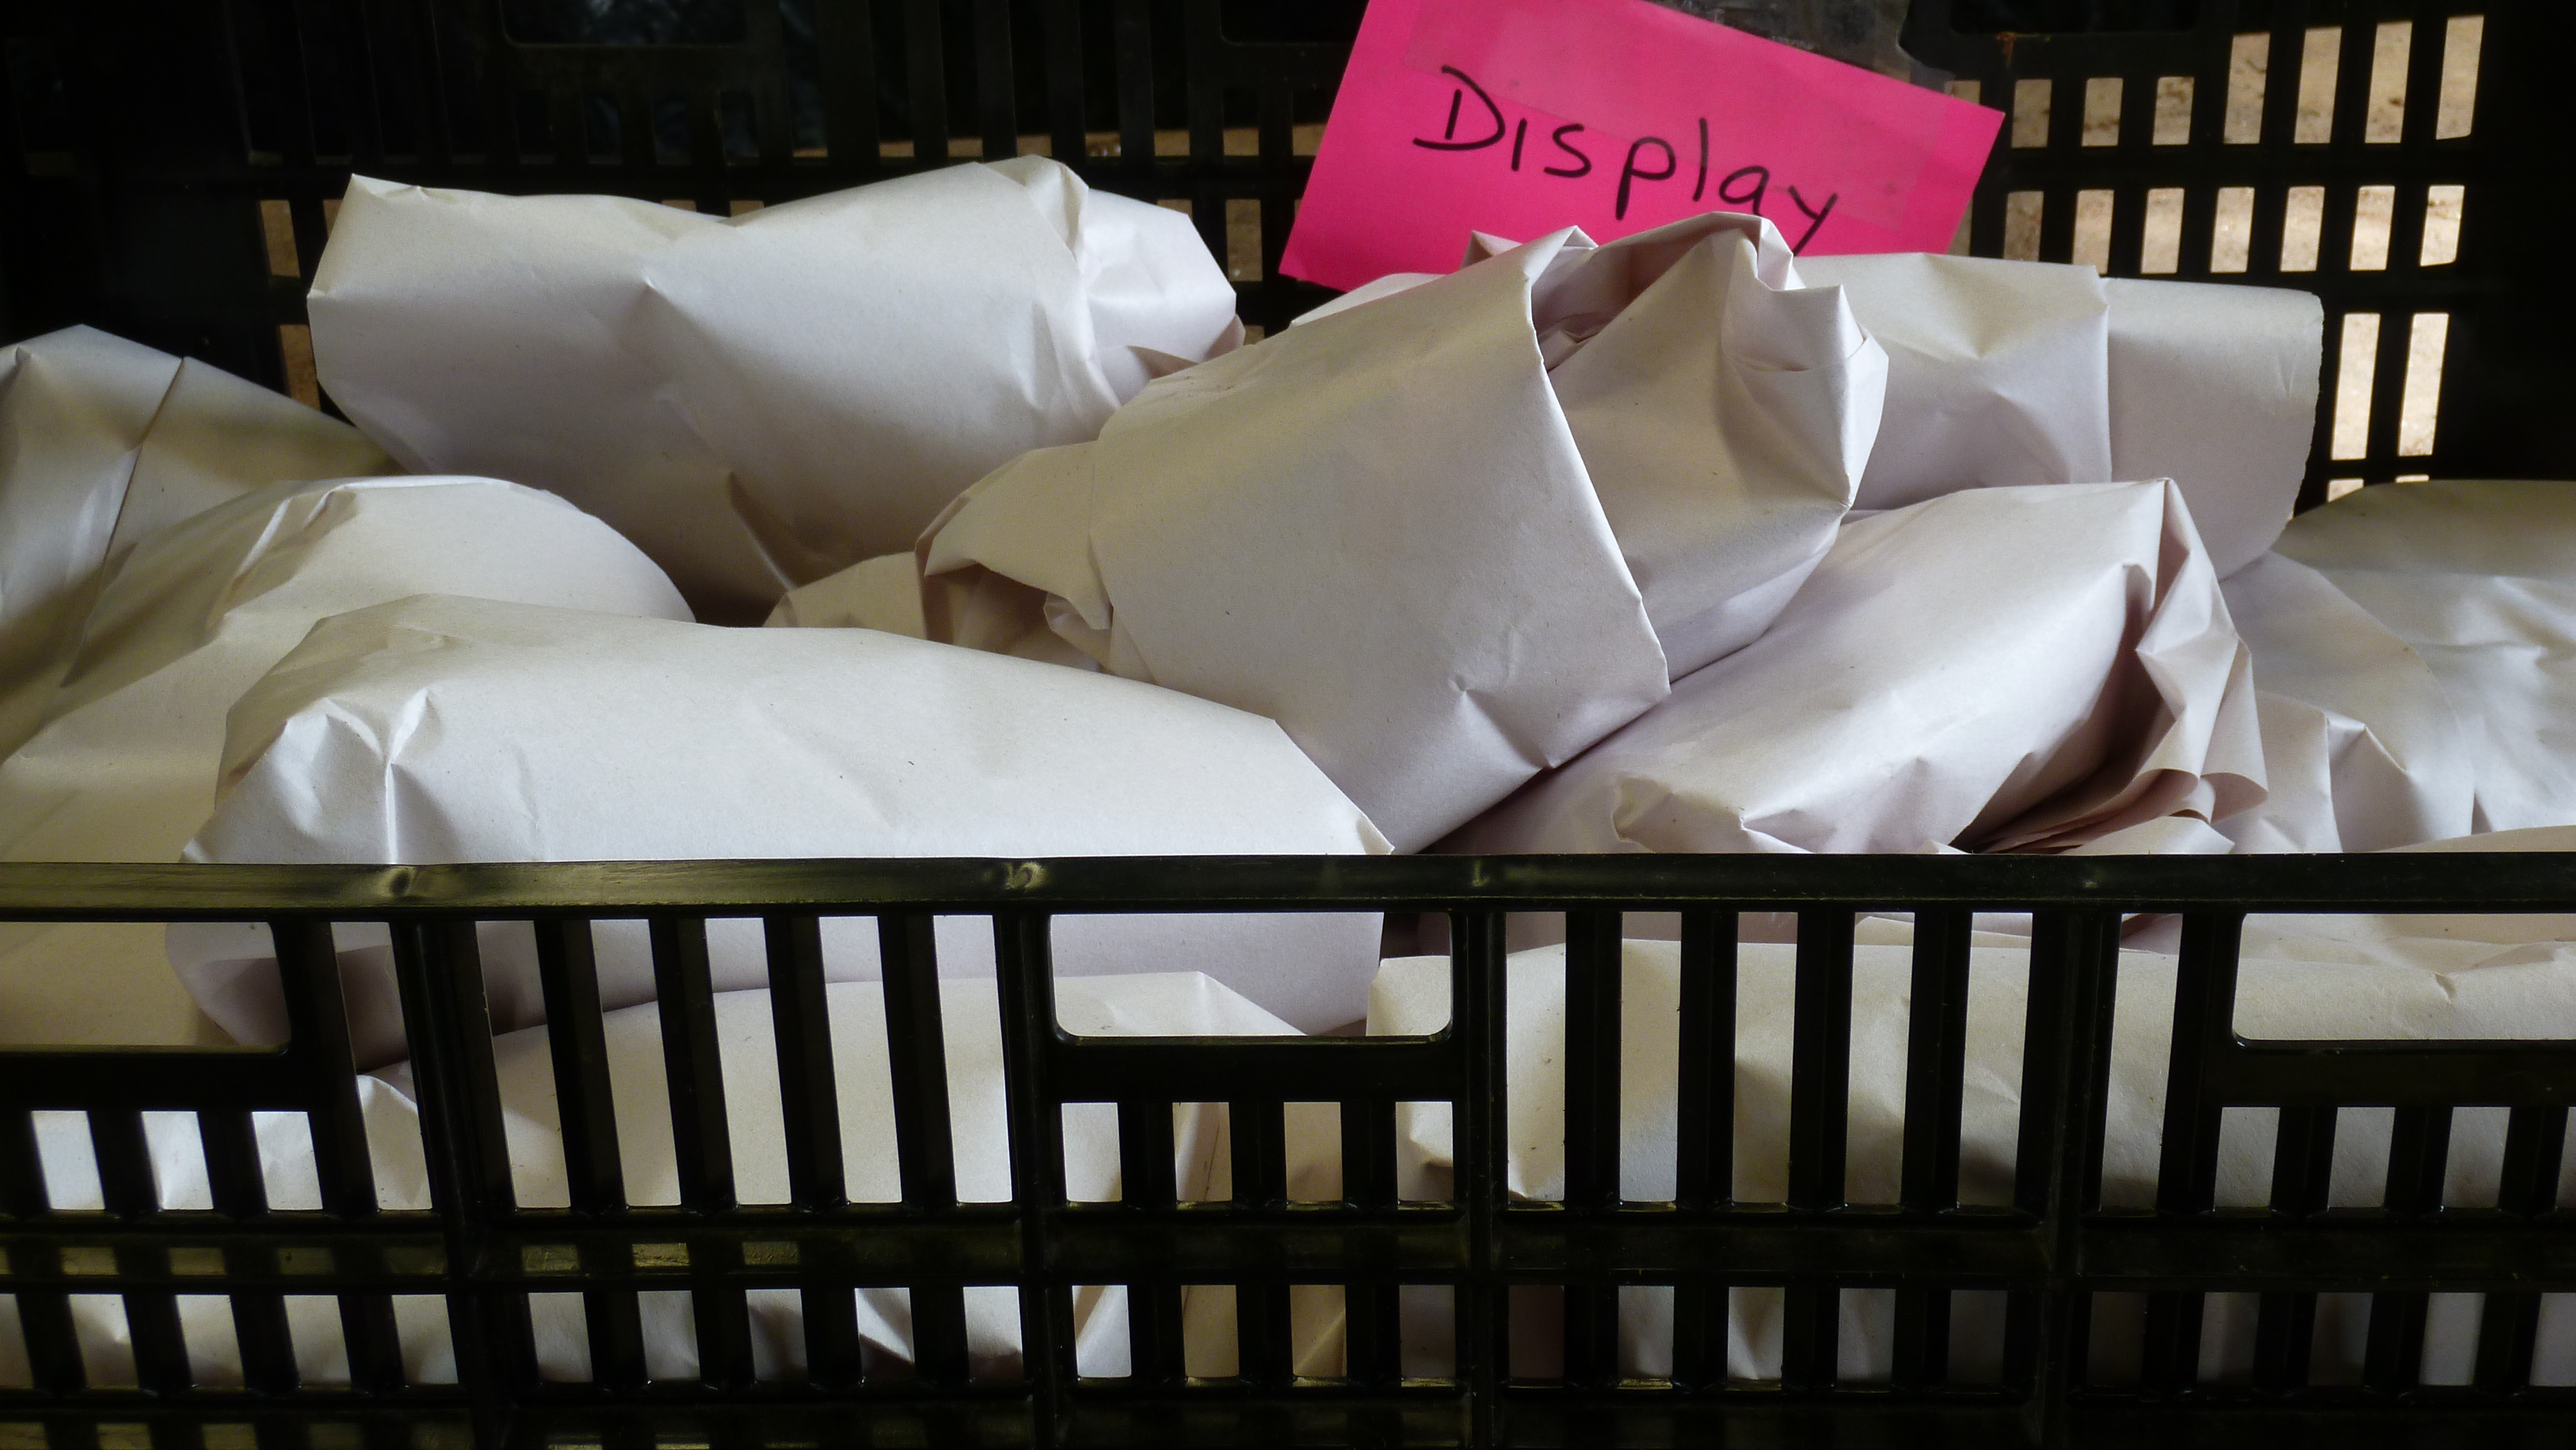
I keep the display tubers from year to year. The age of the tubers ranges from 2 to 15 years old. The tubers have been in winter slumber mode for nearly 3 months . . . each tuber wrapped in a paper blanket with its name label tucked inside. They have been carefully nestled into lily crates, the heaviest tubers on the bottom. The guest cottage here has a fabulous dirt cellar where I store the tubers. The temperature hovers around 50 degrees F.
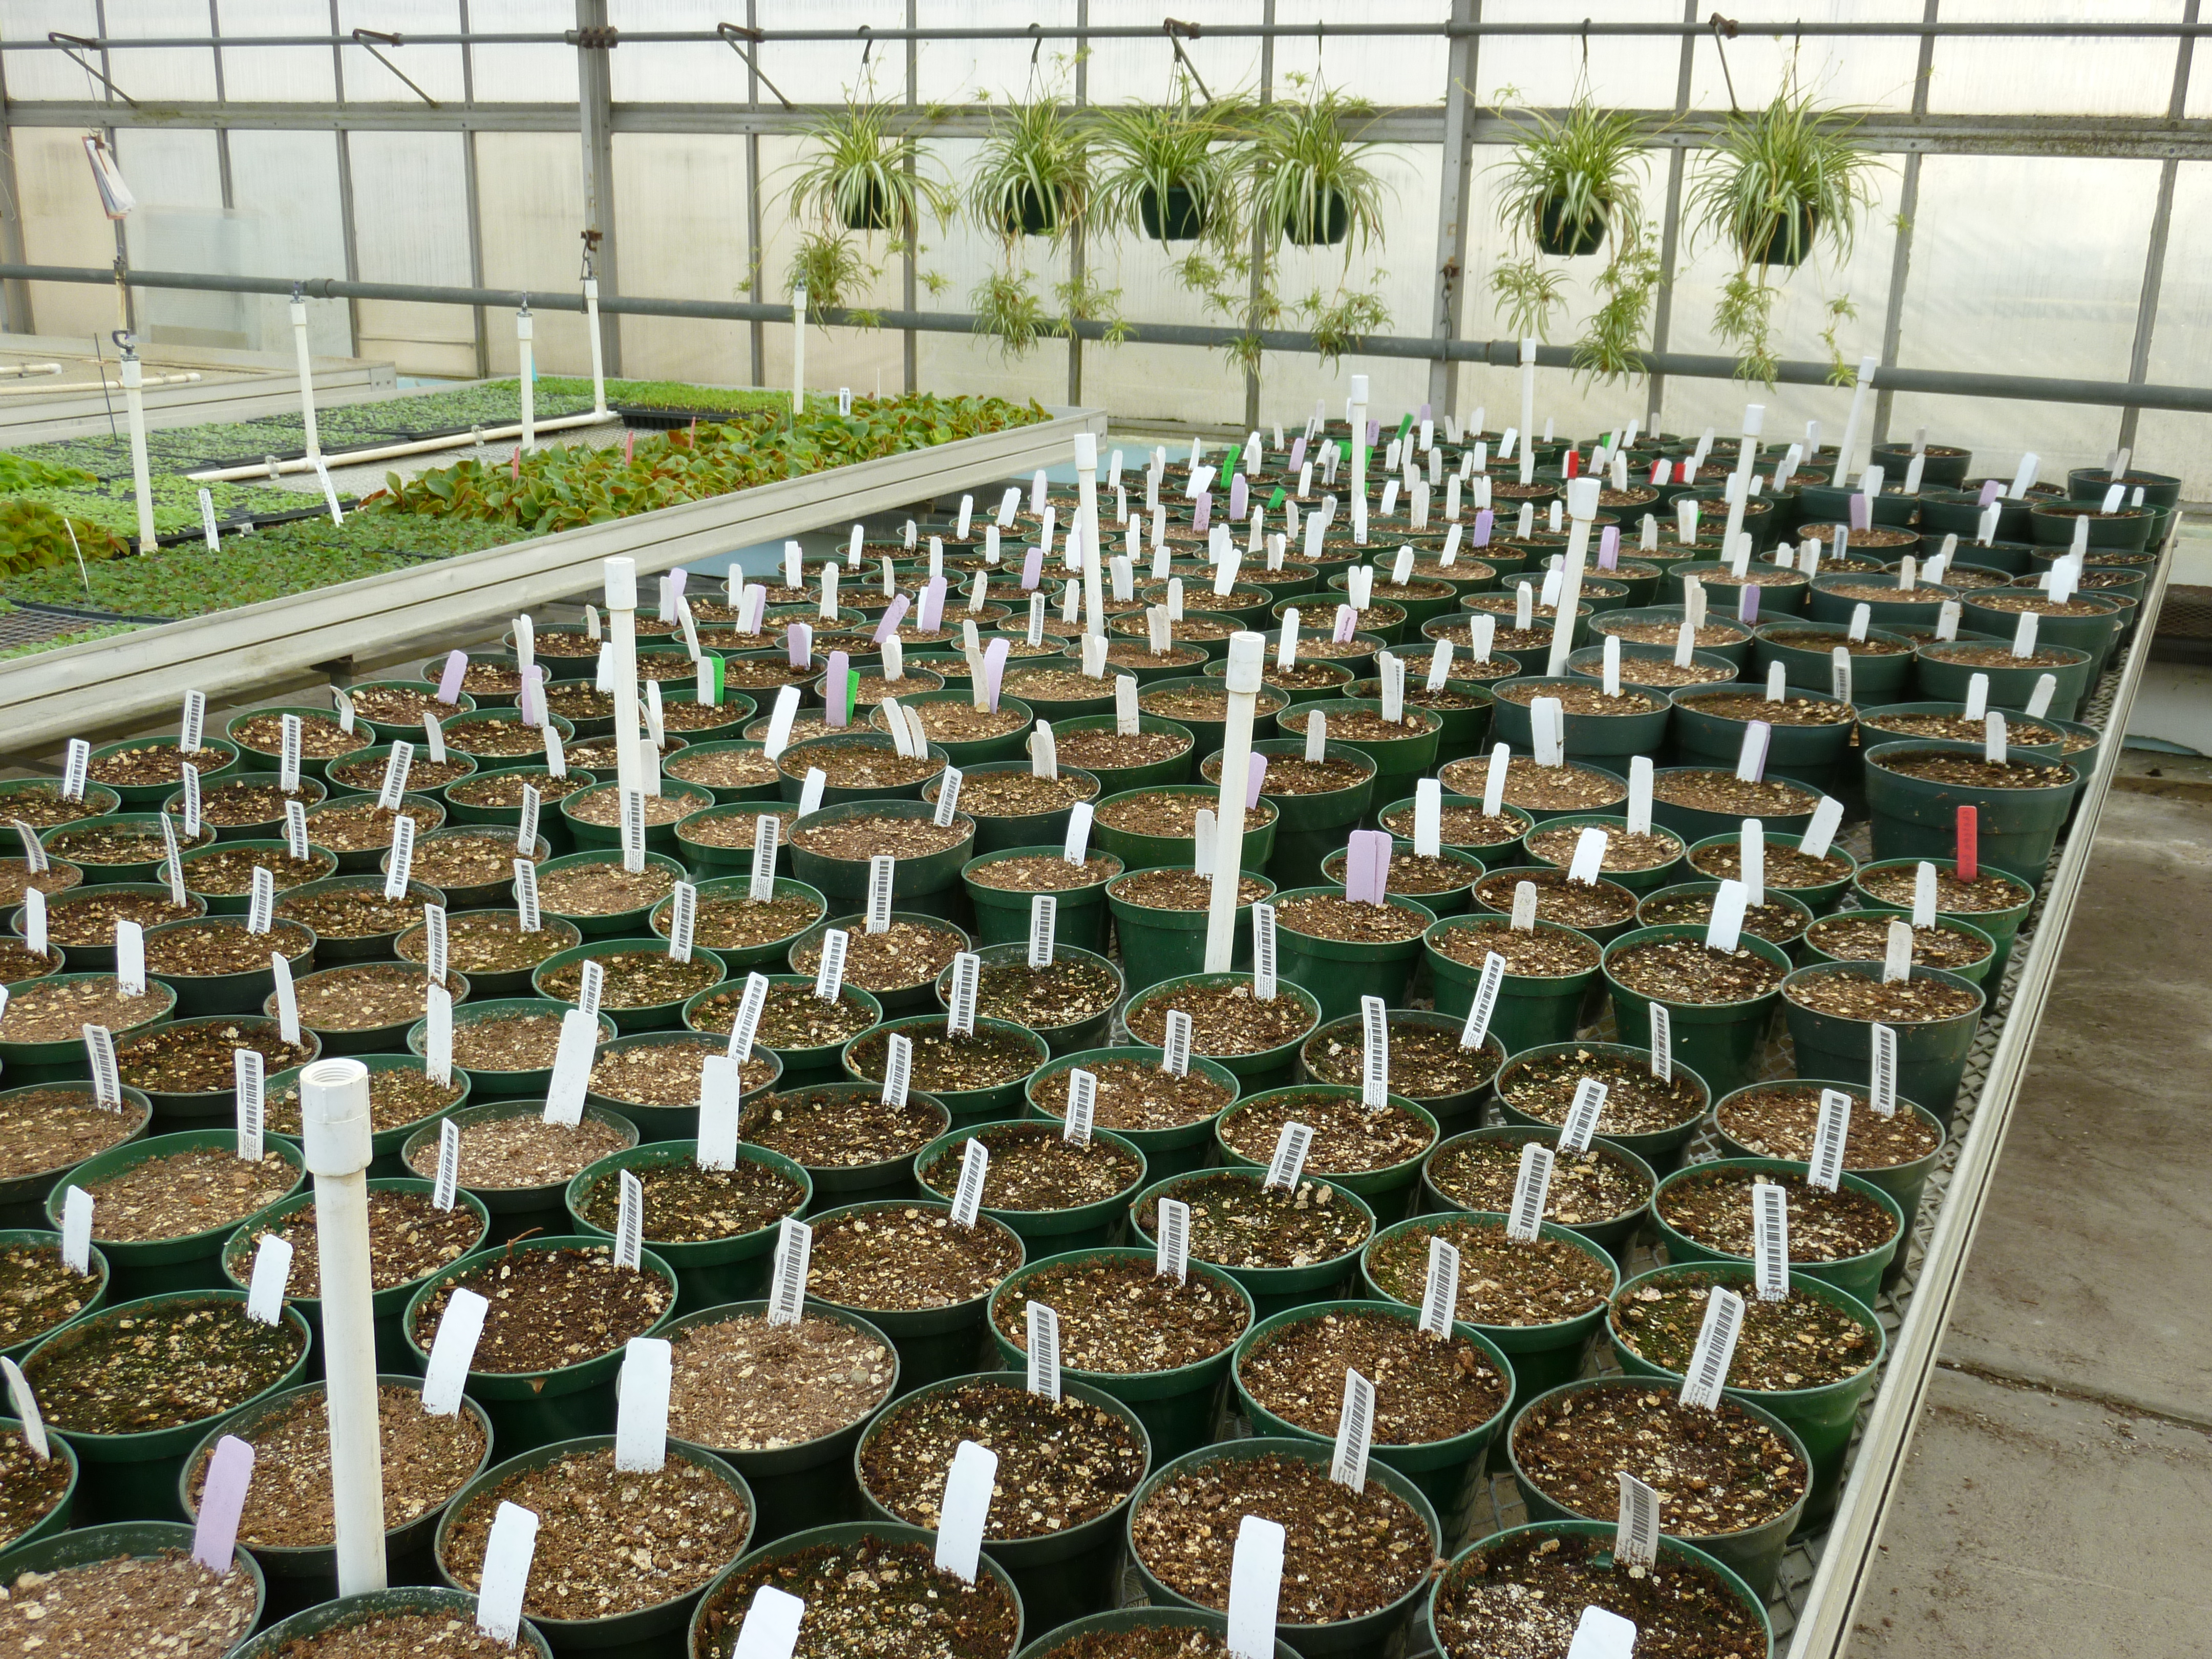
I like to have all the tubers potted up by March 1. In between Amaryllis photo shoots and garden planning sessions at my desk, I scramble about scaring up plastic nursery pots of various sizes, anywhere from 4” to 10” diameters. Barrels of Begonia soil are churned out for me by our potting department. On potting day, I carry my crates of precious cargo up from the basement to my potting station in the headhouse. And then, the fun begins.
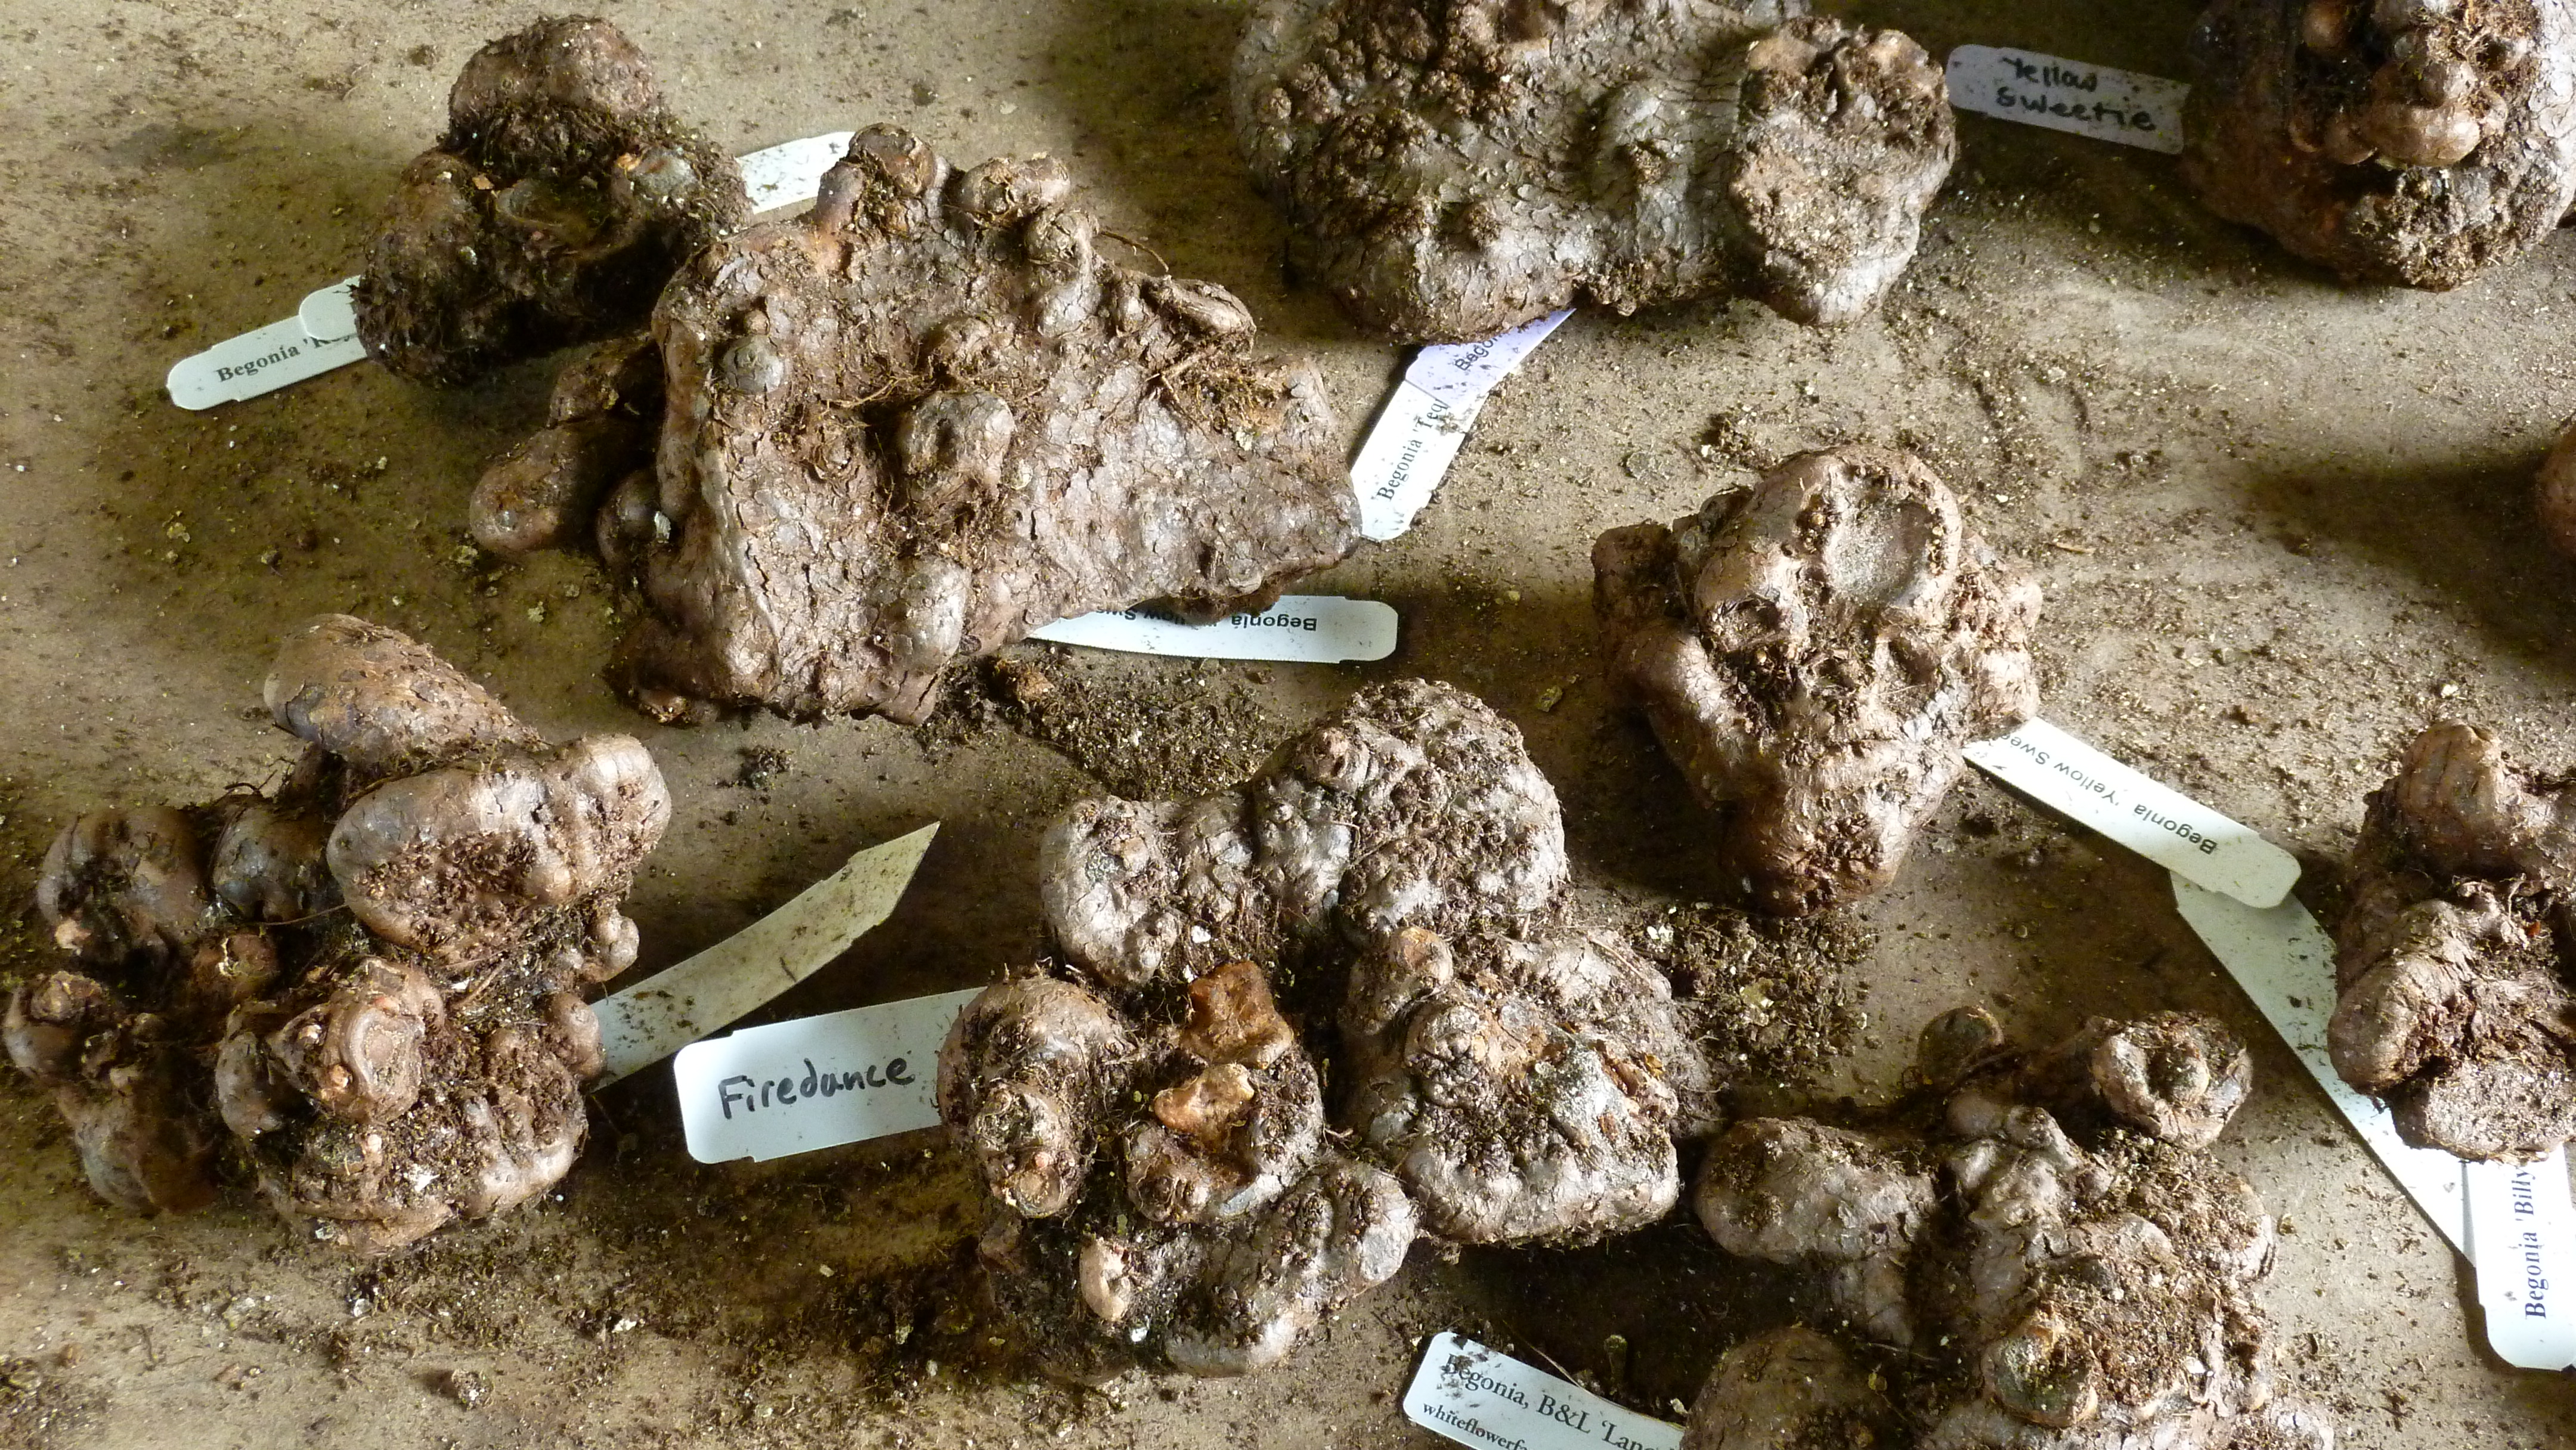
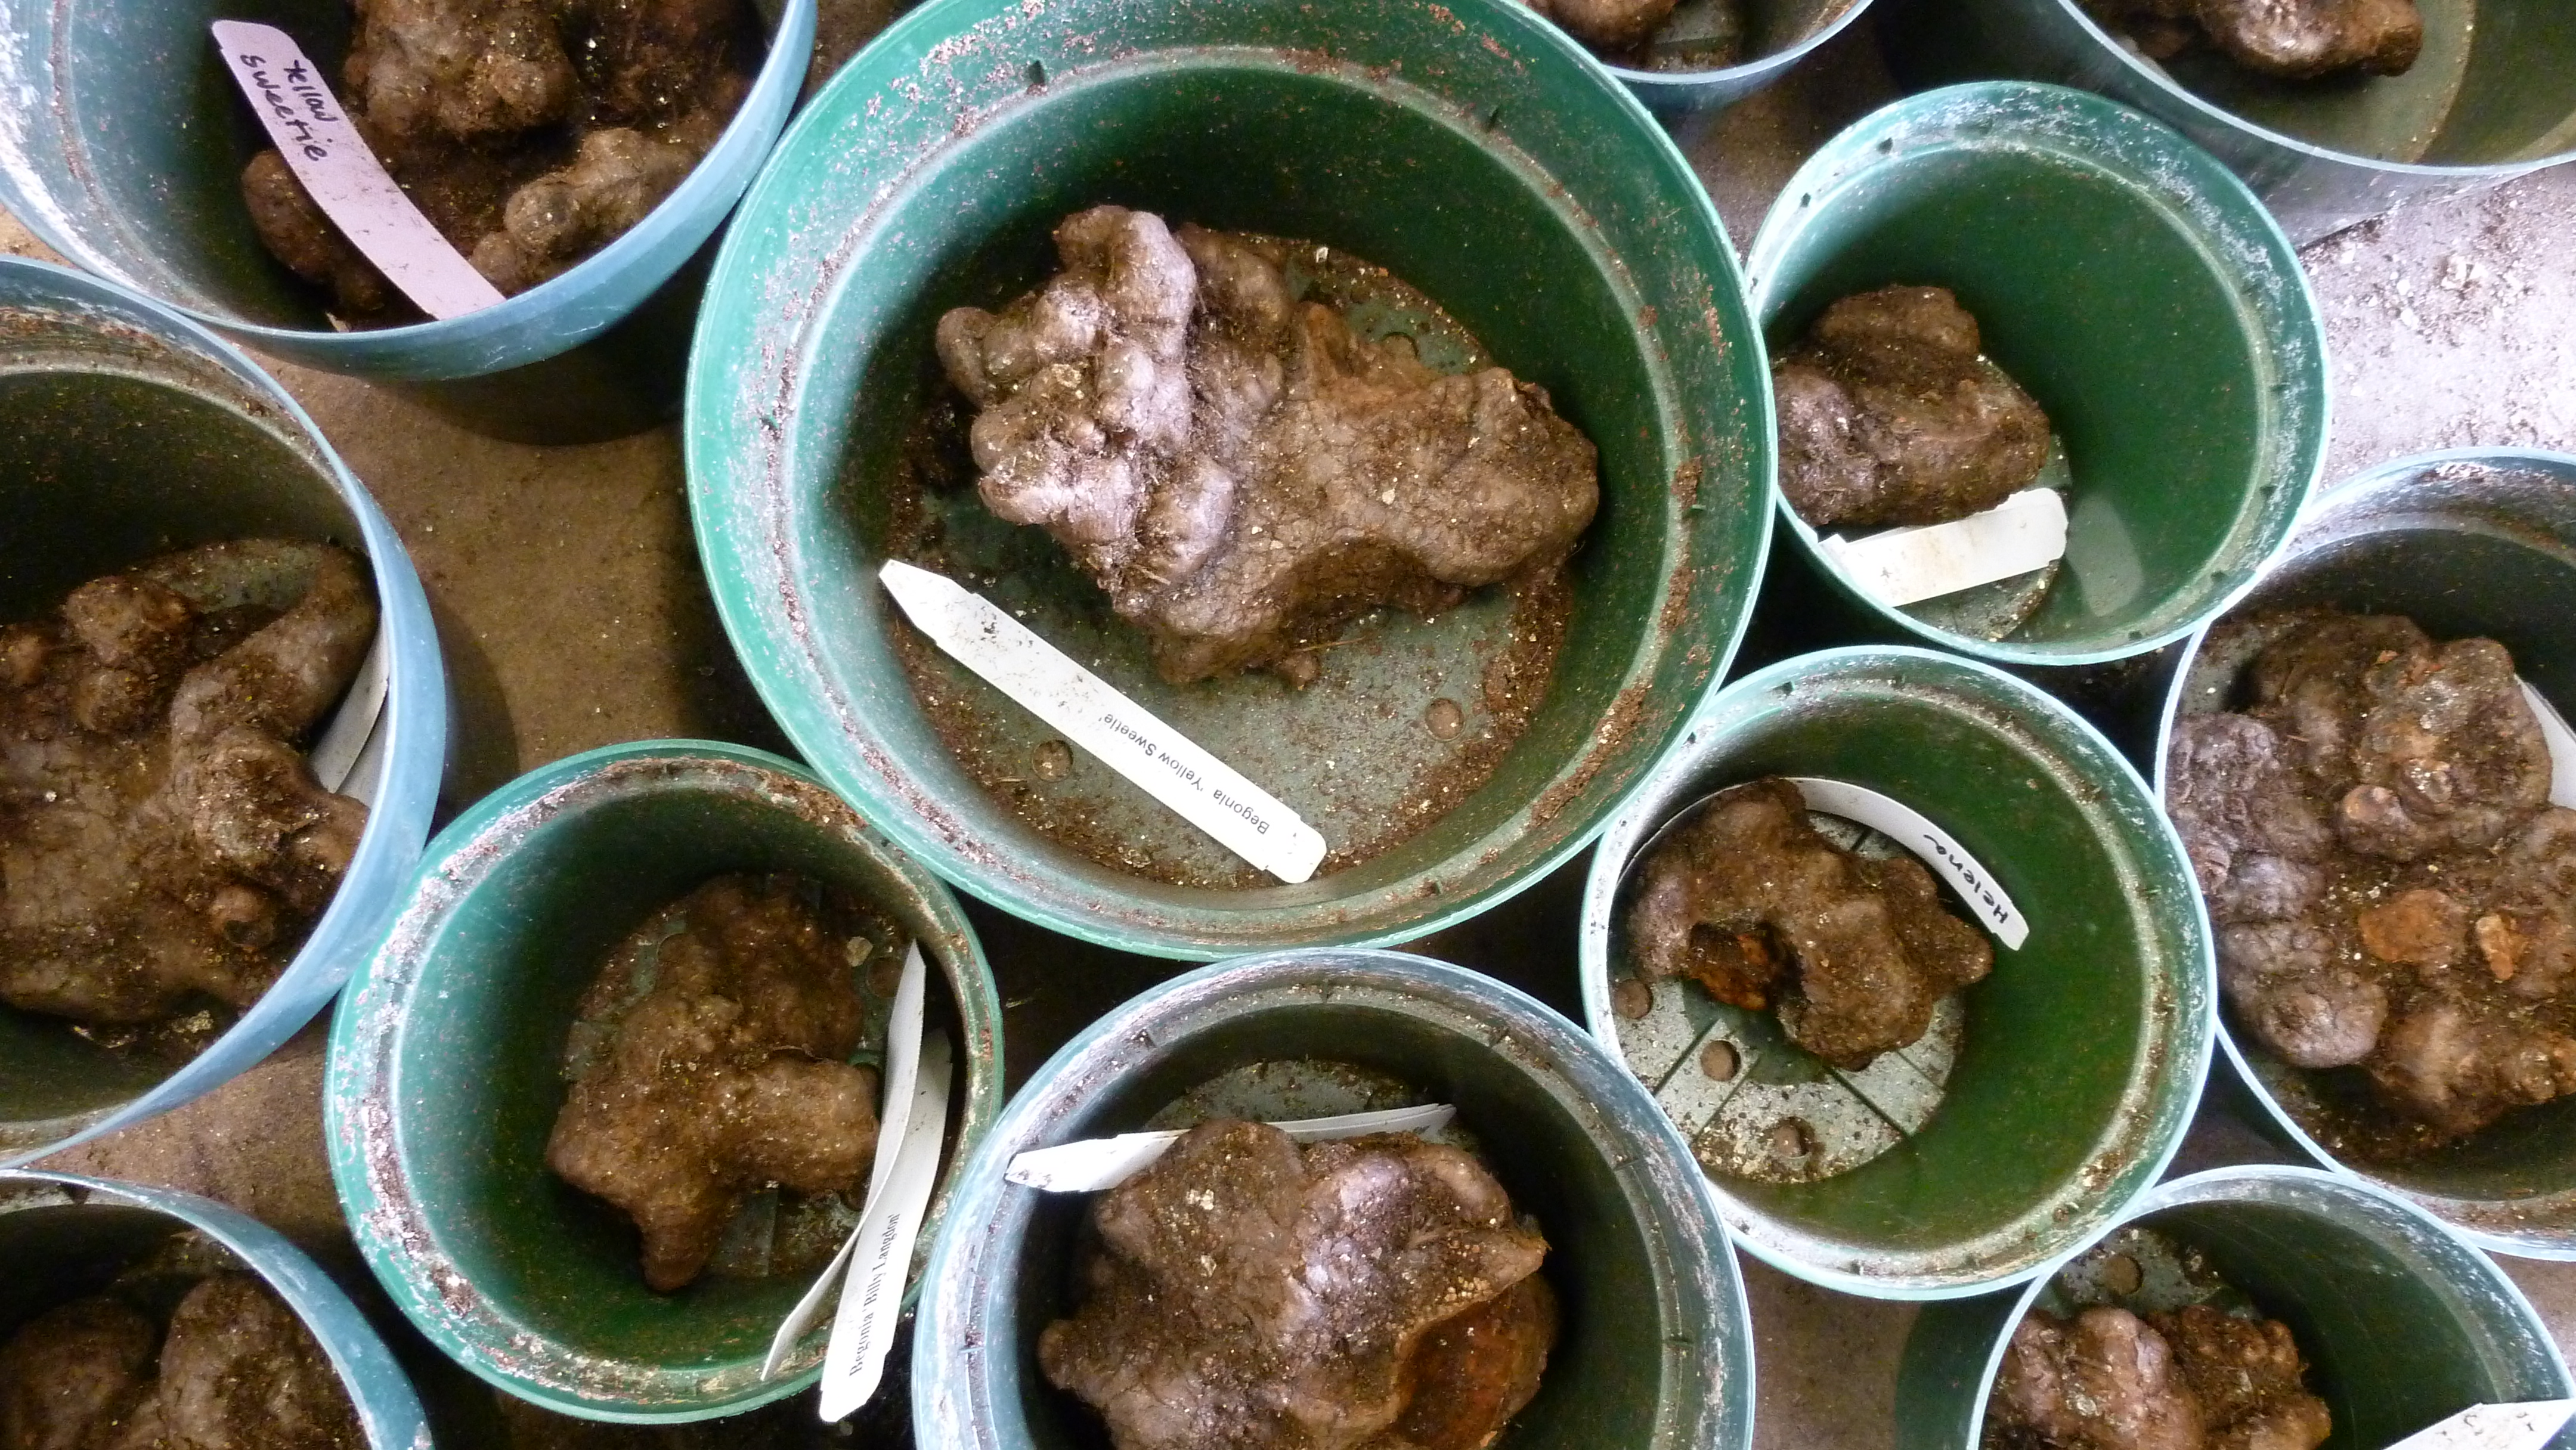
Working through a crate at a time, I unwrap each tuber and, after a brief health examination, lay them out on the table being careful to not separate the name label from its owner. I keep a running inventory of the varieties and how many I have of each. Ideally, I like to have at least 3 of a variety because these are living beings and sometimes I do lose a few to rotting in storage or during the growing season. It’s a sad day if I lose a tuber that was my sole representative of a variety.
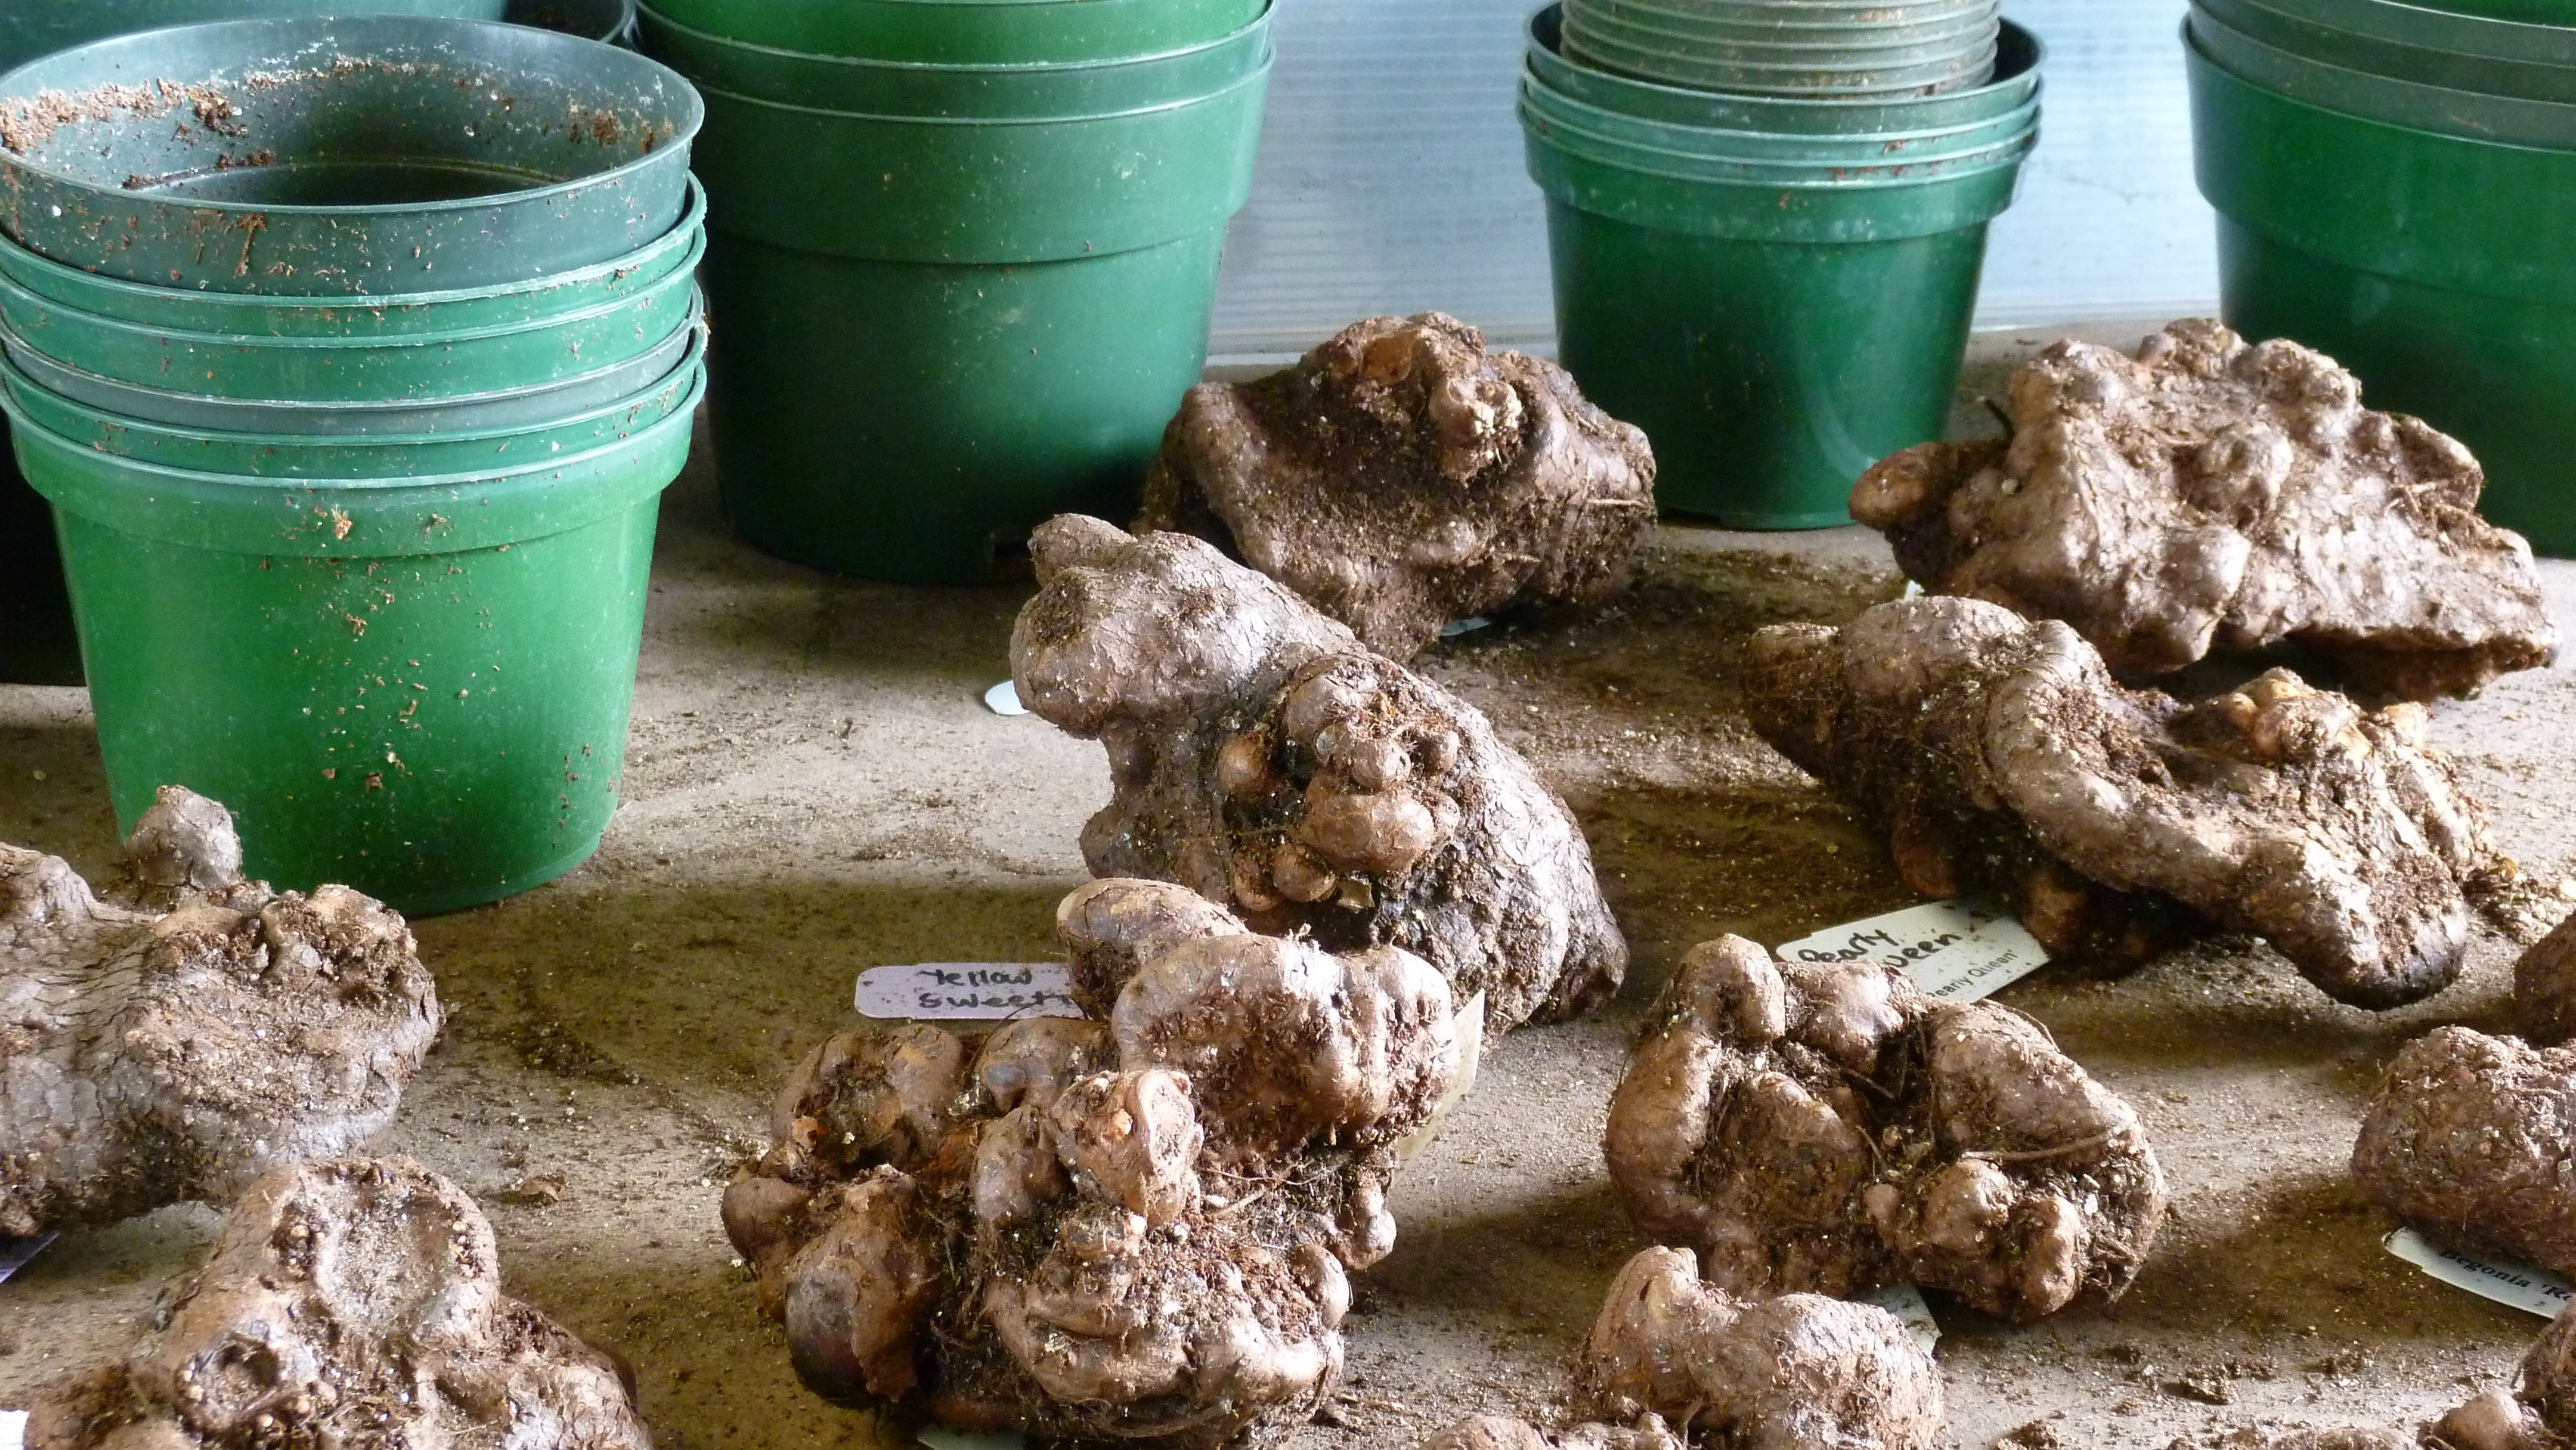
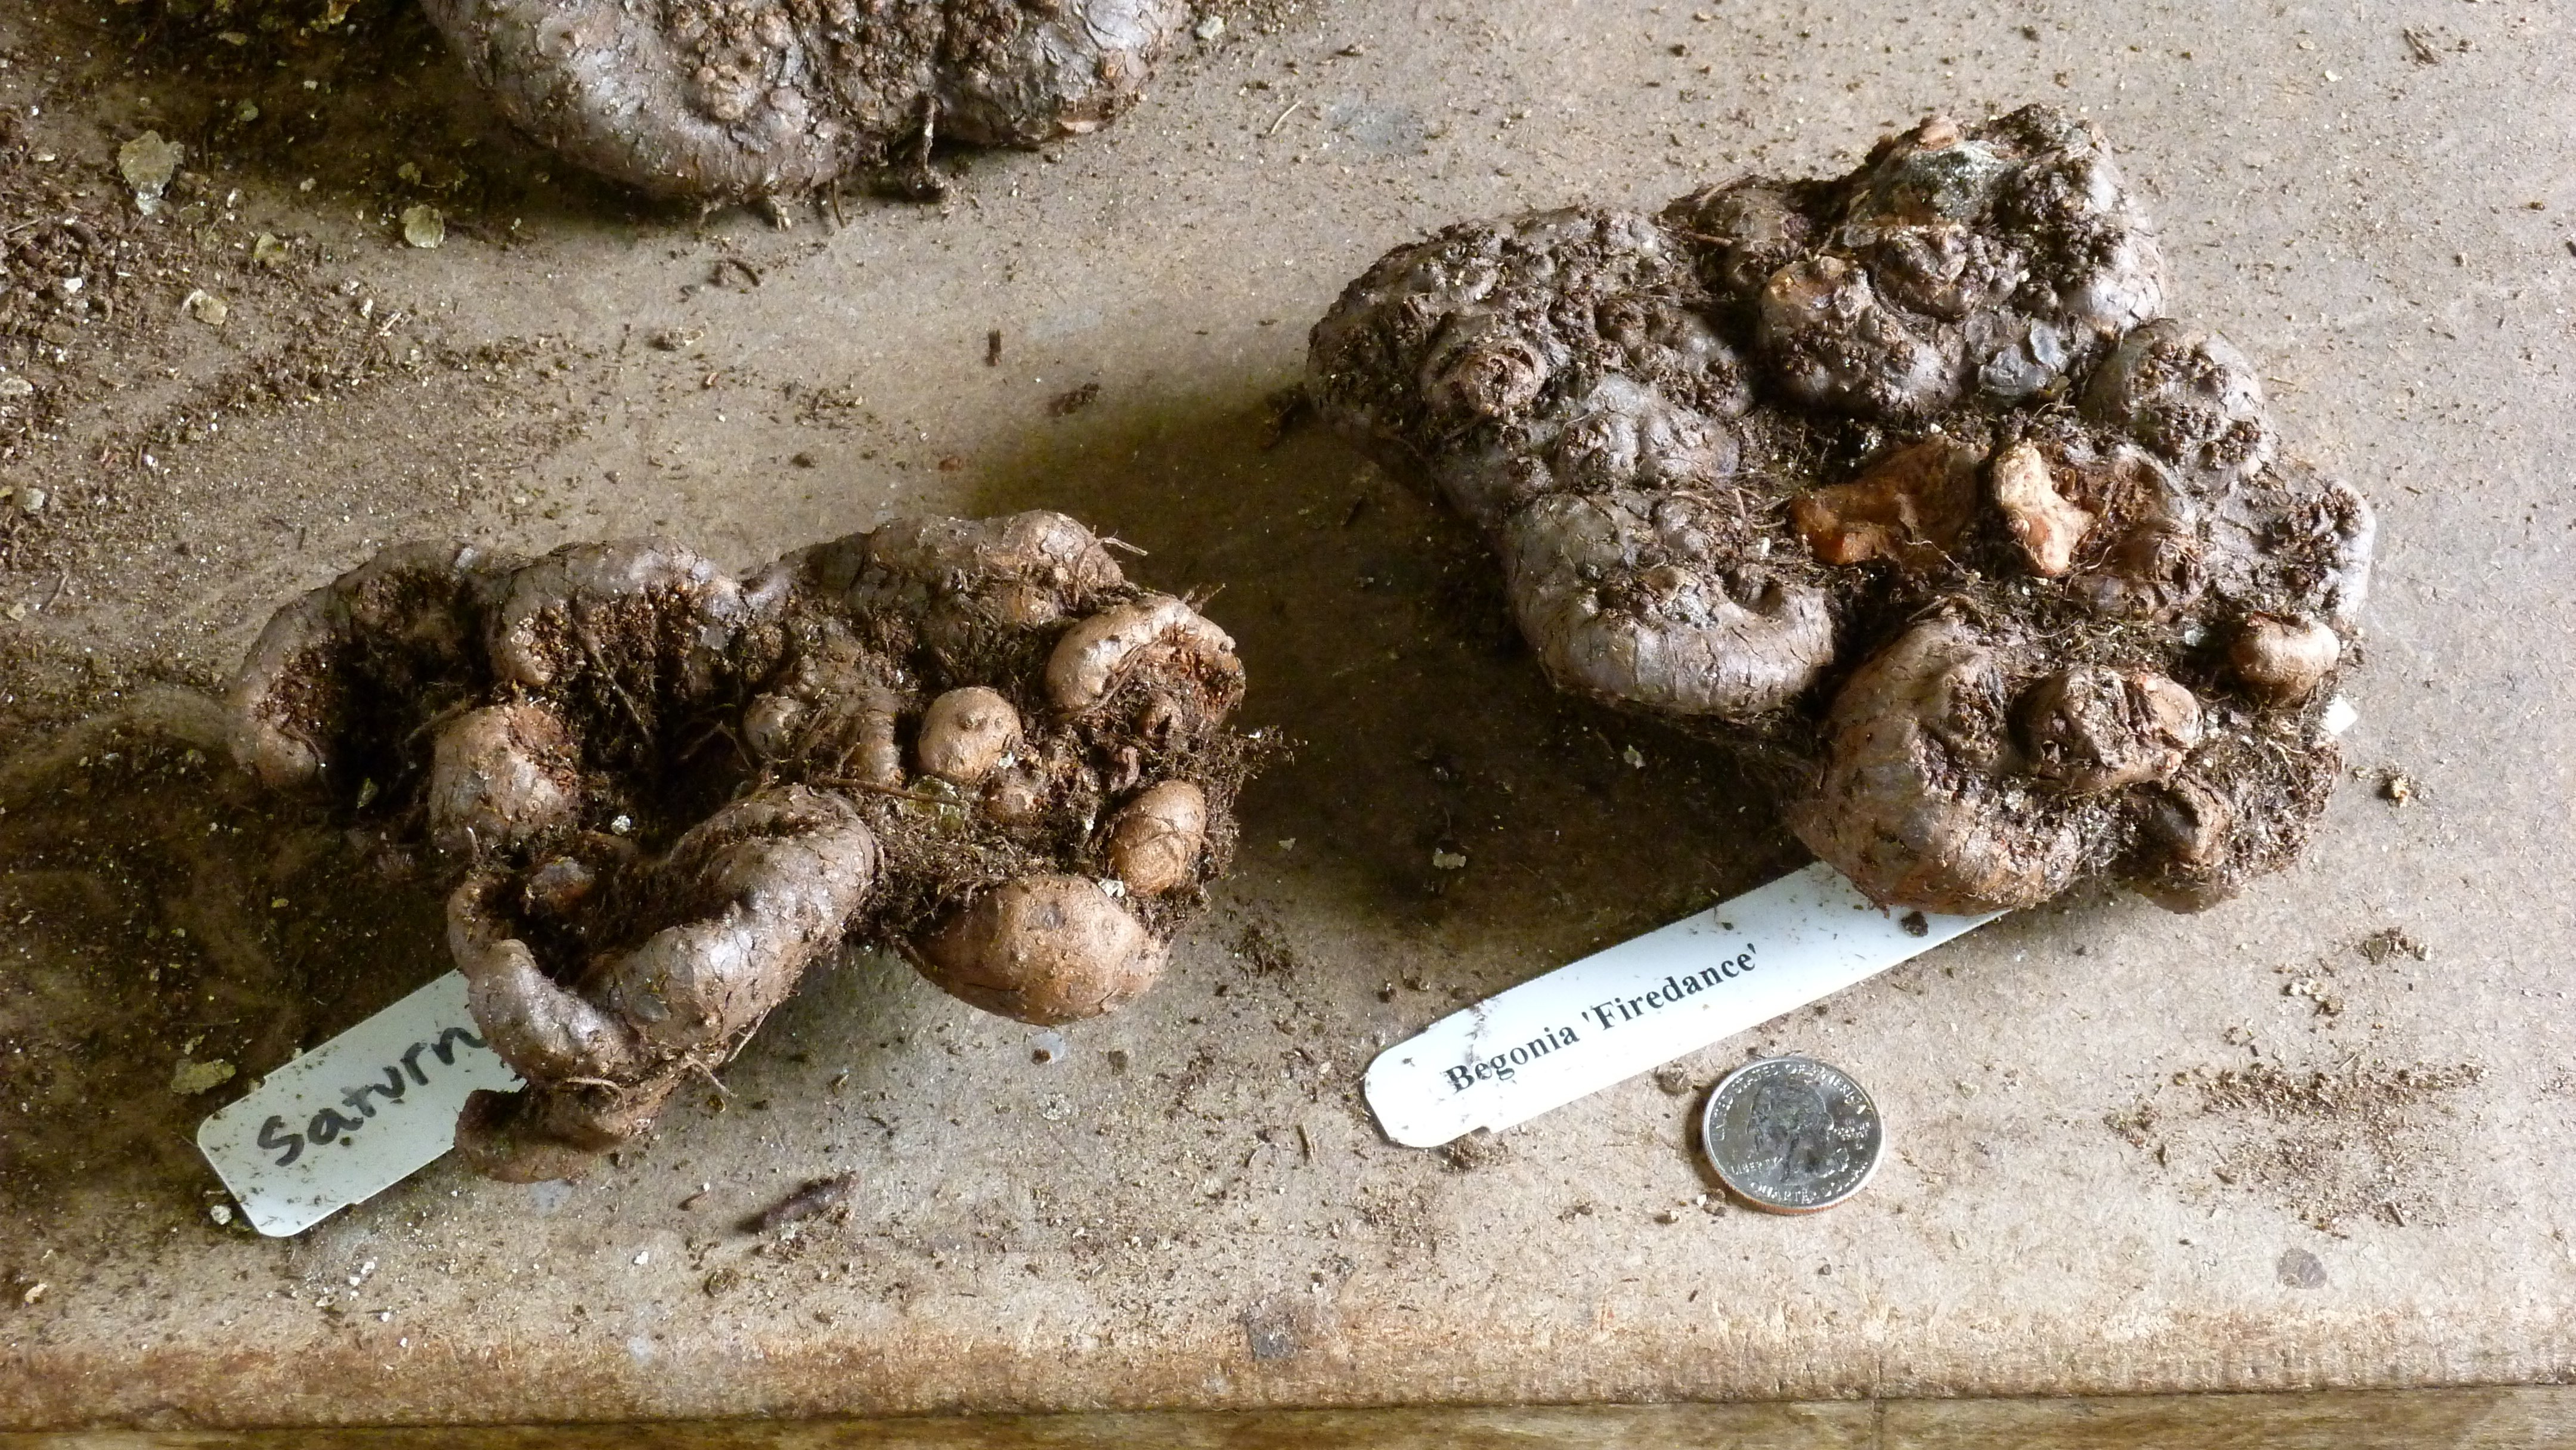
Recently, I had the table covered with tubers and I was taking my tally. A co-worker happened by and asked, “Cheryl, what are you doing with all of those cow pies?” I had to laugh, and I could see his point. The tubers do look like non-descript, brown lumps to the passerby. To me, they are beautiful. Each is unique in shape and size. Some are quite large, nearly the size of a human brain, while others fit quite comfortably in the palm of my hand. I once had a ‘Tahiti’ tuber that looked like the Starship Enterprise! (When you receive your new tuber in the mail, don’t be alarmed at its smaller size. It’s just a baby. Young, happy tubers are eager to add girth increasing in size each season. Remember that my display tubers started out as tiny tots, too!)
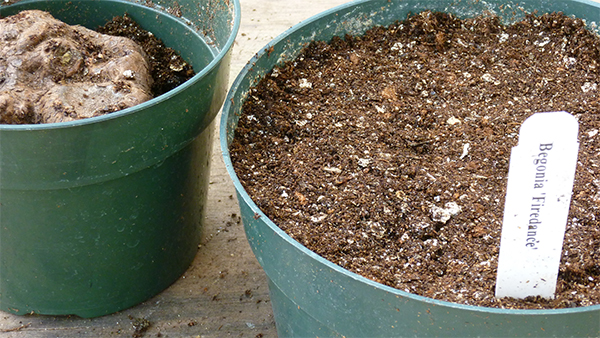
I assign each tuber to a pot that is just big enough to hold its occupant. This is only round one in the potting process. The plants will be transplanted into larger pots once they’ve rooted into the first. I find that stepping the tubers up in this way decreases the chances of rotting tubers. Putting a small tuber in a large, moist soil mass before the tuber can get growing can sometimes have disastrous results.
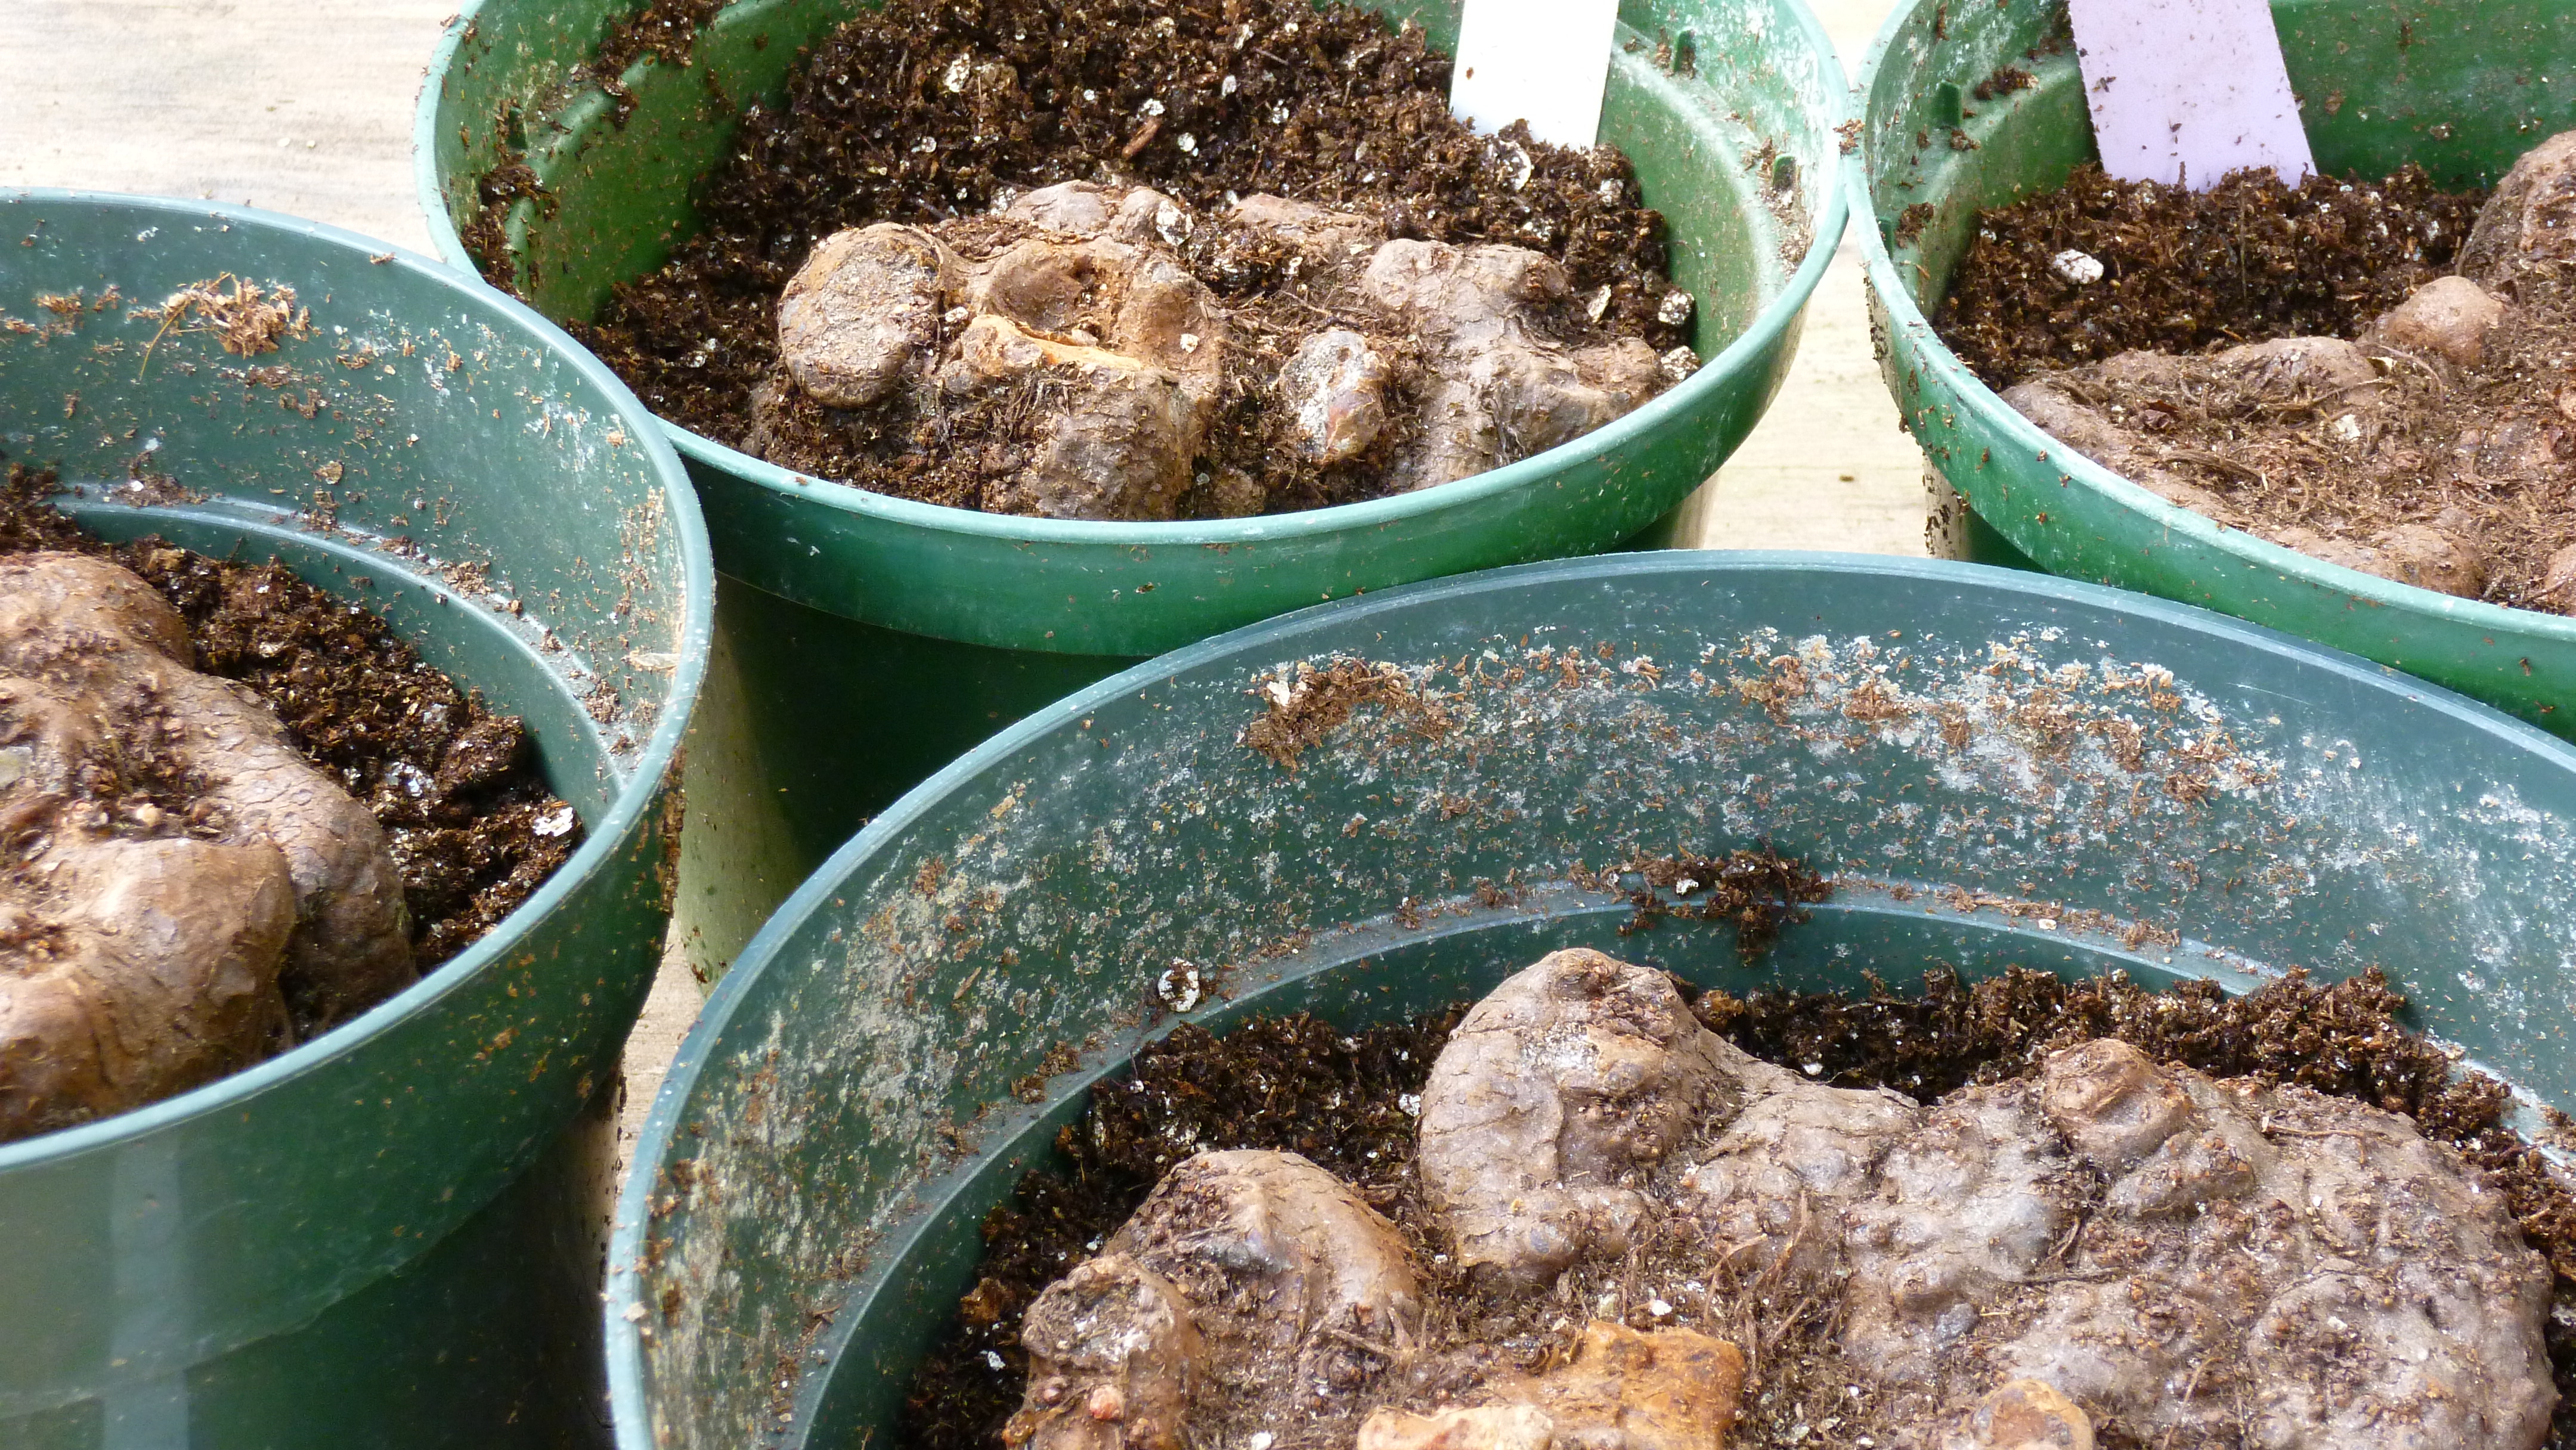
Actual potting is easy. I put soil in the pot and place in the tuber making sure its growing eyes are looking up. I add soil, firming in around the tuber as I adjust its potting depth. I like the surface of the tuber to be no more than 1” below the soil surface.
The pots then take up residence shoulder-to-shoulder in our warm and cozy propagation house surrounded by the freshly rooted cuttings of annuals and tomato seedlings. I give everyone a good drink of water and then I wait.
To be continued . . .
Our Tuberous Begonias begin shipping around mid-March, and you can pot them then. For information, see our Grow Guide, and watch our video, How To Grow Tuberous Begonias.