Category Archives: Begonias

Our Tuberous Begonias – Chapter 1: Waking Up the Tubers

By Cheryl Whalen, Head Gardener

Each year I look forward to Valentine’s Day with eagerness and anticipation. It’s not the chocolate and candy hearts I crave but something much more satisfying. That mid-February love-filled holiday marks the start of the Tuberous Begonia growing season here at the farm. And tending these Begonia beauties is what I love!

Each summer, our display of Tuberous Begonias attracts visitors from hundreds of miles. Our collection of the English-bred Blackmore & Langdon Tuberous Begonias showcases more than 70 varieties of this fantastic strain of Begonias. Perhaps it’s a rare sight to see on this side of “the pond” . . . so many B&L varieties all together composing a colorful symphony for the eyes.

Tuberous Begonias wrapped in paper for winter storage
The Tuberous Begonias, wrapped in paper for winter storage, are brought out of the root cellar on Valentine’s Day.

I keep the display tubers from year to year. The age of the tubers ranges from 2 to 15 years old. The tubers have been in winter slumber mode for nearly 3 months . . . each tuber wrapped in a paper blanket with its name label tucked inside. They have been carefully nestled into lily crates, the heaviest tubers on the bottom. The guest cottage here has a fabulous dirt cellar where I store the tubers. The temperature hovers around 50 degrees F.

Begonia tubers with tags
Our tubers range in age from 2 to 15 years. It’s important to keep a tag with each one so you know which is which.

I like to have all the tubers potted up by March 1. In between Amaryllis photo shoots and garden planning sessions at my desk, I scramble about scaring up plastic nursery pots of various sizes, anywhere from 4” to 10” diameters. Barrels of Begonia soil are churned out for me by our potting department. On potting day, I carry my crates of precious cargo up from the basement to my potting station in the headhouse. And then, the fun begins.

Small tuber and large tuber
The size of the tubers varies considerably.

Working through a crate at a time, I unwrap each tuber and, after a brief health examination, lay them out on the table being careful to not separate the name label from its owner. I keep a running inventory of the varieties and how many I have of each. Ideally, I like to have at least 3 of a variety because these are living beings and sometimes I do lose a few to rotting in storage or during the growing season. It’s a sad day if I lose a tuber that was my sole representative of a variety.

Begonia tubers and pots
When selecting a pot for each tuber, choose one that’s just big enough to hold its occupant. The plants will be transplanted into larger pots once they’ve rooted in the first.

Recently, I had the table covered with tubers and I was taking my tally. A co-worker happened by and asked, “Cheryl, what are you doing with all of those cow pies?” I had to laugh, and I could see his point. The tubers do look like non-descript, brown lumps to the passerby. To me, they are beautiful. Each is unique in shape and size. Some are quite large, nearly the size of a human brain, while others fit quite comfortably in the palm of my hand. I once had a ‘Tahiti’ tuber that looked like the Starship Enterprise! (When you receive your new tuber in the mail, don’t be alarmed at its smaller size. It’s just a baby. Young, happy tubers are eager to add girth increasing in size each season. Remember that my display tubers started out as tiny tots, too!)

tubers nestled in their pots
Here are the tubers nestled in their pots.

I assign each tuber to a pot that is just big enough to hold its occupant. This is only round one in the potting process. The plants will be transplanted into larger pots once they’ve rooted into the first. I find that stepping the tubers up in this way decreases the chances of rotting tubers. Putting a small tuber in a large, moist soil mass before the tuber can get growing can sometimes have disastrous results.

pot with potting mixture and tubers
Fill each pot about halfway with potting mixture, and settle the tuber in, making sure its eyes are looking up.

Actual potting is easy. I put soil in the pot and place in the tuber making sure its growing eyes are looking up. I add soil, firming in around the tuber as I adjust its potting depth. I like the surface of the tuber to be no more than 1” below the soil surface.

Begonia tuber in pot
Add soil, firming in around the tuber and adjusting its potting depth so the surface of the tuber is no more than 1″ below the soil surface.

The pots then take up residence shoulder-to-shoulder in our warm and cozy propagation house surrounded by the freshly rooted cuttings of annuals and tomato seedlings. I give everyone a good drink of water and then I wait.

Begonia tubers in propagation house
Properly potted and labeled, the tubers take up residence in our propagation house, surrounded by freshly rooted cuttings of annuals and Tomato seedlings.

To be continued . . .

Our Tuberous Begonias begin shipping around mid-March, and you can pot them then. For information, see our Grow Guide, and watch our video, How To Grow Tuberous Begonias.

Tuberous Begonias: The Last Chapter

Going Dormant, and Winter Slumber

By Cheryl Whalen, Head Gardener

Rewind a few months back to early October . . . The tuberous begonias in our display house begin to show signs of fatigue after four hot summer months of blooming their heads off. I close the doors to the public for the season, and the plants, no longer in the spotlight, breathe a sigh of relief. Even though there is still some color radiating from the display, the flowers are smaller and sparse. Tinges of yellow are beginning to show up on previously lustrous green foliage. Both the plants and I are in agreement. We only want to be in the public eye when we are flaunting fantastic flowers and fresh foliage so as to not disappoint our visitors with a subpar show. As I close the doors, I applaud the performance of the begonias with a standing ovation. I couldn’t be happier with their splendid show in what seemed to be a hotter than normal summer. Now begins the process that leads to a well- deserved winter slumber.

2_tuberous-begonias

October and November are not stressful for the begonias. I turn down the thermostat in the greenhouse to near 45F. As the autumn temperatures outside start to dip, the plants respond. Flowers and foliage fade and begin to look dull. I check the plants weekly for watering needs, providing drinks for those plants with dry soil. I don’t force the dormancy issue. I let the plants go down on their own time. That’s important because the plants need time to prepare their tubers before sleep. Energy drains out of the leaves and stems back down to the tubers storing essential fuel for the next growing season.

4a-tuberous-begonias

I do go through the plants and gently pinch out their growing tips. It only hurts for a second. New flowers keep being produced as the stem tip grows out. By pinching the tips, the plants no longer need to expend energy trying to make new flowers at this late date.

4-tuberous-begonias

For several weeks, I see slow progress in the greenhouse toward that ultimate goal of dormancy. Then as the days get shorter I see dramatic changes. About the time in mid-November when I leave for work in the dark and return home in the dark, the plants are full speed ahead in the process. The foliage completely yellows and stems redden. I go through the plants once a week cleaning up fallen leaves and giving each stem a gentle tap. Stems that are ready to be removed fall over easily like trees being felled in the forest.

5-tuberous-begonias

By early December, I’m left with what looks to the innocent bystander like just a bunch of soil-filled pots. It’s time to unpot those precious tubers that lie within. I knock each plant out of its pot and carefully unearth each tuber. I peel away the soil from the tuber and brush it off with my seasoned, soft paintbrush. I examine each tuber for soundness. Most are happy and healthy. Sometimes I find one or two that are soft and squishy and need to be discarded. It’s sad when that happens.

6-tuberous-begonias

After their once-over health check, the tubers are placed in trays all sorted by variety. The sizes and shapes of the tubers are really quite variable and fun to look at!

I turn the thermostat up to 50 degrees in the greenhouse while the tubers are exposed. They will sit out in the air for a week or so to cure before packing. I hesitate to put them to bed too moist for fear that winter rot might take hold. I do find myself compelled to cover the whole lot each evening with a tarp. It makes me feel better if not the tubers!

8-tuberous-begonias

The packing process is easy. After checking in for inventory roll call, each tuber is wrapped in a sheet of newsprint paper with the proper label tucked securely inside. The precious paper packages are then gently laid in lily crates. The crates get shuffled off to the guest cottage dirt cellar where they are neatly stacked. The tubers settle in for their long winter’s nap. They rest . . . I rest. It won’t be long until St. Valentine’s Day, and we can do it all again!! Happy winter to all!


It’s Showtime! The Next Stage in the Life of Tuberous Begonias

By Cheryl Whalen, Head Gardener

So here we are already midway through July. I know I’ve left you hanging for a bit and I can tell you are hankering for more tales of the tuberous begonias. With the bulk of the garden planting done and our annual Open House in the rear-view mirror, my attention can now turn back to making the begonias happy and comfortable.

The begonias responded nicely after making their move into their final pots. They got to work rooting into their new-found foot room and in turn they increased their lush top growth in height and girth. Then the buds began to appear and the first satiny flowers of the season unfolded.  We were ready for entertaining! I was able to open the doors of the display house to our visitors a week before the first of June which is my usual targeted opening day.  The first few flowers of the season seem extra special to me. Maybe it’s because I haven’t seen them in months and I’ve missed them so.

The first blossom of the season for Begonia 'Saturn.'
The first blossom of the season for Begonia ‘Saturn.’

The first flowers are just the beginning. That one boutonniere of a blossom is the precursor to the formation of many buds and soon the plants can become heavily clad in bodacious blooms. The next task that becomes urgent as the upright begonias grow taller is staking. Even though the plant stems appear thick and strong, it is very necessary to provide some additional support for those stems so that the weight of the blooms and gravity don’t cause the stems to topple and snap away from the tuber. I provide each plant with a sturdy stake or sometimes two. I push each stake into the soil being very careful not to impale any of the precious tubers. Then patiently I go through each plant, tying in each main stem to the stake using my soft, 3-ply garden twine. I like to loop the twine around the plant stem first and then cross it over and loop around the stake making a figure eight with the twine. The stem still has room to grow without being girdled by the twine and the knot seems to stay put where it’s tied around the stake.

P1010986
Even though the Begonia stems appear thick and strong, it is necessary to provide additional support for those stems so that the weight of the blooms and gravity don’t cause the stems to topple and snap away from the tuber.

As summer progresses I settle in to my daily routine of begonia upkeep. I check each plant daily for water needs, allowing the soil of each to become dry between watering. I don’t allow the plants to be dry for too long especially on hot, sunny days when the possibility of wilting looms. I give the plants the daily once-over removing any spent blossoms and the occasional unsightly leaves that may appear.  At the same time, I double-check the plants for adequate staking. As the plants continue to grow, I sometimes have to add more ties or stakes to ensure my plants continue to stand tall.

Aside from the bit of time it takes to do the daily chores, the rest of the summer can be spent enjoying the fantastic flowers! I thought I’d introduce you to some of the family . . .

B&L Tuberous Begonia 'Firedance' in hanging basket.
Blackmore & Langdon Tuberous Begonia ‘Firedance’ in a hanging basket.
Blackmore & Langdon Tuberous Begonia 'Nectar.'
Blackmore & Langdon Tuberous Begonia ‘Nectar.’
P1010948_begonia house_BEST copy
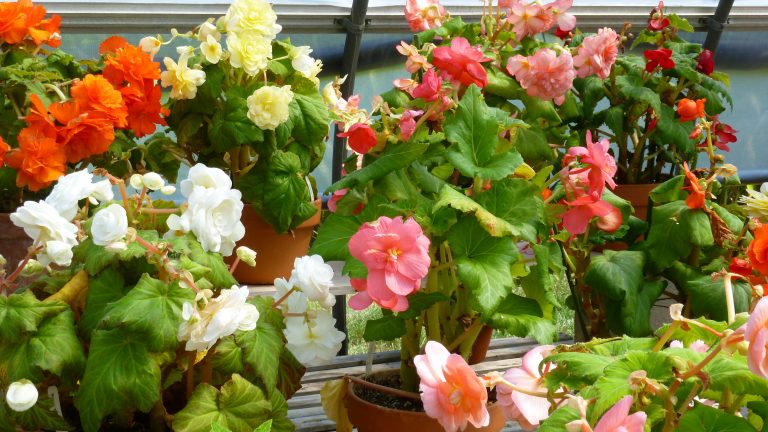
White Flower Farm’s Begonia House at the height of the blossom season.
john smith, center, a fragrant variety with fruity spicy scent
Begonia ‘John Smith,’ center, a fragrant variety with a fruity spicy scent.

P1010928

Moving On: The Next Stage in the Life of Tuberous Begonias

By Cheryl Whalen, Head Gardener

Photos by Alison Rabinko

Cheryl's potting table in the greenhouse.
Cheryl’s potting table in the greenhouse.

So here we are more than halfway through May and my activities in the tuberous begonia display house are well underway. For the past six weeks, I’ve been busy repotting begonias into their final pots for the season. This is also the time to try to root a few stem cuttings which, with any luck, will yield tiny new tuber tots by fall.

Gently knock each plant out of its pot. If a network of fibrous roots covers the outer surface of the soil mass, the begonia is ready for repotting.

Of course the begonias are not all ready to be potted up on the same day. Each plant roots into its starter pot according to its own whim. It’s a process. You will find me most Saturday mornings throughout spring quite content in my makeshift workshop in the begonia house tending to those begonias that are ready to make the move. Gently knocking each plant out of its pot, I look for a network of fibrous roots that pretty much covers the outer surface of the soil mass. If the root system is not developed enough, the plant goes back to the bench and I wait another week.

Add a bit of slow release fertilizer.

The upright display plants get transplanted into 10” clay pots. The potting process is simple. With plant and pot in front of me and my barrel of potting mix at my side, I get busy. After filling the pot to nearly halfway with soil, I set in the begonia being careful not to sink the top of the root ball too deeply. I sprinkle a half teaspoon of a slow release fertilizer like Osmocote in the soil around the plant. Then I follow up with more soil to fill the pot, pressing lightly on the soil surface to firm it in. I pop in the plant nametag so our guests can be properly introduced to each variety when they visit the nursery. Everyone gets a thorough watering to settle them into their new digs. With words of encouragement, back to the bench each begonia goes eager to get growing.

Some of the tuberous varieties tend to have lots of active eyes that grow up into a plant with many stems. It’s quite possible to cheat a few of these stems away from the tuber with no ill effects.

I have found that some of the tuberous varieties tend to have lots of active eyes that grow up into a plant with many stems. It’s quite possible to cheat a few of these stems away from the tuber with no ill effects. These stems can be rooted, and in time they will form new tubers and become the newest additions to my family.

When separating a stem from the tuber, Cheryl makes certain to cut below the tiny pinkish bud (visible just at the base of the stem). The bud ensures this cutting will eventually form a new tuber.

I take these cuttings right before the plants get moved up to their final pot. First, I select the stem I want to take. Then, with the root ball exposed, I peel back the soil until I can see where that stem attaches to the parent tuber. Looking closely at the very base of the stem, I spy a tiny pinkish bud. I need to make sure that when I make my cut that I am below that bud. Without that bud, the stem will make only roots but never a tuber. With the tip of my knife, I carefully cut and sort of pop the stem off of the tuber.

The young fibrous roots on the stem cutting.

Most times the stem cuttings already have some young fibrous roots attached. With the cutting in hand, I trim away some of the leaf surface area to prevent wilting until those tiny roots can take hold. Using my multitasking Sharpie, I dibble a hole in the soil of a small pot, and I plant the stem. One inch of the stem should be undercover in the soil. I water in the fresh cutting and place it with the others in the shady spot in the back of the greenhouse. For the first week or so, I spritz the cuttings with water a few times a day until the roots can catch up and provide adequate water to the top growth.

Using the multitasking Sharpie as a dibbler to make holes in the planting mix.

Our mail order tubers are still born and raised in England. I like to make my stem cuttings from the tuberous begonia varieties that are part of our collection but not currently found in the for-sale list. So sometimes I am able to offer our store visitors the chance to purchase a variety or two that they could not have purchased otherwise from our catalog. My selections for purchase in the begonia house do vary from year to year.

Gently firming the soil. Don't forget to label the cutting unless you like surprises!
Gently firming the soil. Don’t forget to label the cutting unless you like surprises!

Stem cuttings are not the only way to make more begonias, but it’s the one way I’ve tried so far. I would like to investigate other propagation possibilities just to satisfy my own curiosity. If only I had some more spare time . . . To be continued . . .

(To see previous chapters in the life cycle of Tuberous Begonias, scroll down.)

Earthquakes: The Next Stage in the Life of Tuberous Begonias

By Cheryl Whalen, Head Gardener

The first two or three weeks after potting tuberous begonias I don’t expect to see anything happening.  I check in on the potted tubers weekly, providing water to the occasional pot if the soil has dried out. All appears quiet and peaceful on the surface, but I know there’s a bevy of activity going on below.

P1010699
First on the Begonias’ to-do list is to make fresh fibrous roots, and they get right to it.

The spring sunshine boosts the greenhouse temperature during the day and warms the soil in each pot. The tubers awaken and respond to this cozy environment. First on their to-do list is to make fresh fibrous roots, and they get right to it. Simultaneously, the eyes of the tubers start to expand just like they would on that potato that might be hanging around on the kitchen counter for too long. It is from these eyes that the stems and leaves will form.

P1010703
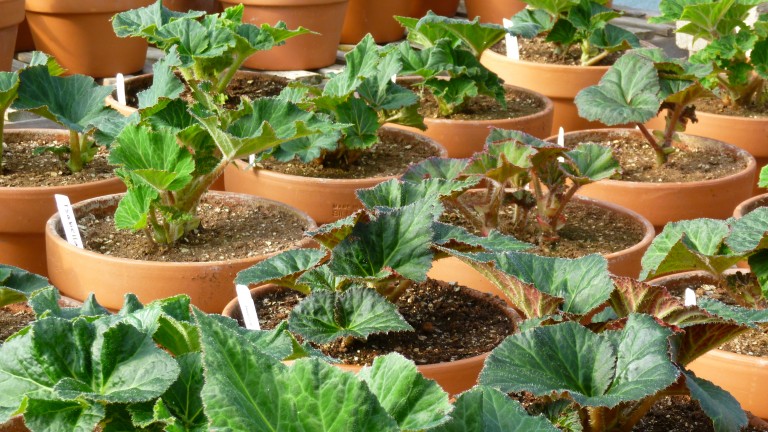
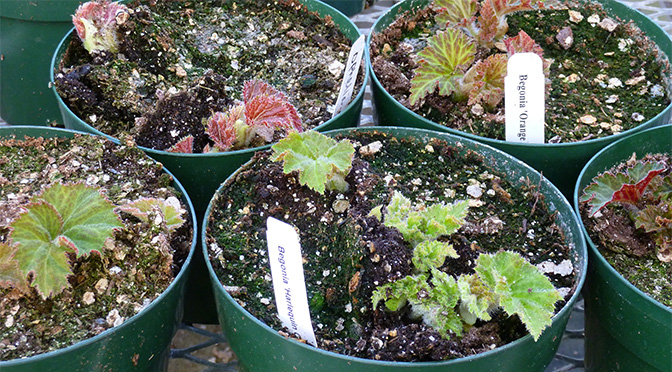
Cracks and fissures begin to appear on the surface of the soil as if tiny earthquakes had occurred. Fresh and fuzzy leaves are eagerly pushing through the soil.

And then . . . finally . . . halfway through week four, I see it and my heart skips a beat. Something is happening! Cracks and fissures begin to appear on the soil as if overnight the Earth shook and tiny earthquakes had occurred. Peering closer into each crack I can see the fresh and fuzzy leaves eagerly pushing through the soil determined to see the daylight. It makes me think of butterflies bursting forth from their cocoons, and I smile. It won’t be long before these babies will be packing up and moving to the begonia display house for the summer season.

Stay tuned . . .

(To read Chapter 1 in the Life of Tuberous Begonias, click here.)