Astilbe Care
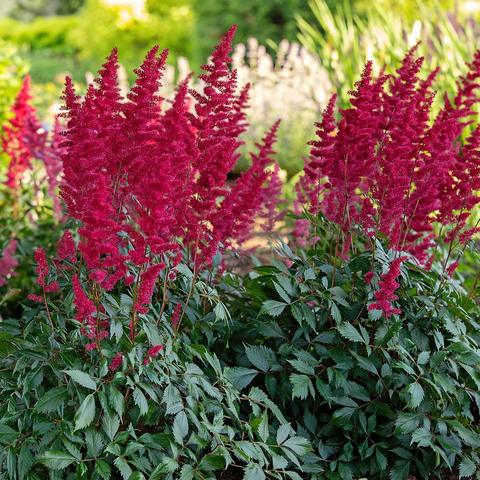
Generations of gardeners can tell you why Astilbes are one of the most essential and beloved perennials for part-shade gardens with evenly moist soil. These reliable, low-maintenance, deer-resistant plants are best known for upright, fuzzy-looking plumes that add drifts of color to the garden in late spring and early summer. The plumes of some Astilbe varieties are densely packed with color while others display a silhouette that is airier and more loosely structured. All Astilbes can be relied upon to add beauty and a welcome vertical accent to part-shade and woodland gardens. Flower heads aside, Astilbes are equally prized for their distinctive foliage, which has a feathery, light texture that creates visual contrast amid companion plants including Hostas, Hellebores, Hakonechloas, Brunneras, and Pulmonarias. Over time, Astilbe plants spread to form clumps, creating a ground cover that has the considerable benefit of suppressing weeds.
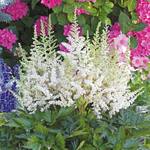
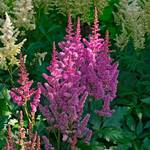
Different varieties of Astilbe may range in size from 8” to 4’ tall (including the plume). They are best planted in multiples, which allows gardeners to make the most of the spectrum of colors including white, pale pink, dark pink, purple, and red, and the varying heights and blossom times. Individual Astilbes typically flower for two to three weeks, but because some varieties bloom later than others, it’s possible to orchestrate an extended show that can last for most of the summer. When the plumes have lost their color, the toasty-colored flower heads continue to bring structure, texture, and vertical accents to the garden for the duration of the growing season and beyond. Many gardeners leave the plumes standing (they are lovely dusted in snow). The plumes will decay naturally or, if not downed by the elements, they can be cut back in spring.
How to Use Astilbes
In the gardens at the farm, Astilbes have been a feature for longer than we remember. Taller varieties of white Astilbe with graceful plumes sway in a breeze in the part-shade areas of the White Garden. Staggered drifts of pink, white, and red Astilbes grow amid Hostas, Hellebores, and Hydrangeas in the dappled light of the Shade Garden.
If space allows, plant Astilbes in multiples. Cluster plants in groups of threes or fives. Choose varieties that flower at different heights and different times and in a spectrum of colors to create a harmonious tone-on-tone effect.
Astilbes are also terrific for bouquets. They make an unusual addition to flower arrangements when cut fresh or dried.
Astilbe Companions
Astilbe plumes add a welcome vertical accent to borders and beds in part-shade. They are especially effective when surrounded by plants with mounding habits. Here are some of our favorite partners for these indispensable perennials:
Perennial Companions:
- Alchemilla mollis (Lady’s Mantle)
- Brunneras
- Perennial Geraniums
- Ferns
- Hellebores
- Hostas
- Hakonechloas (Japanese Forest Grass)
- Ligularias
- Pulmonarias
Annual Companions:
- Begonias
- Coleuses
- Impatiens
Shrub Companions:
- Aralia ‘Sun King’
- Hydrangeas
Astilbes: Carefree Color for Part-Shade & Woodland Gardens
Astilbes are not only attractive and highly serviceable plants, they have endeared themselves to generations of gardeners by being carefree and infinitely more rugged than they appear. Astilbes flower reliably year after year with little fuss or maintenance. Beneath the feathery foliage and fuzzy plumes is a constitution of iron – with one stipulation — Astilbes will not tolerate being dry. They prefer well-drained, evenly moist soil that is rich in organic matter (such as decomposed leaves or compost). During dry spells, it is crucial to water them, especially if they are new plants still settling in.
Planting Astilbes
When: Plant Astilbes in the spring or fall when temperatures are relatively cool but there is no danger of frost. Avoid planting them in summer heat or during periods of drought when conditions might stress the plants or possibly kill them.
Where: The key to success in growing Astilbes is to ensure that they are sited in evenly moist, well-drained, organically rich soil that ideally has a pH level that is slightly acidic. With those considerations in mind, the plants will thrive in various light conditions depending on your hardiness zone. In southern areas of the United States, Astilbes do best in light to moderate shade with only 3–4 hours of sun per day. In northern regions, they can take quite a bit more sunshine provided the soil remains moist. (We don’t generally recommend planting Astilbes in full sun, but some varieties can take up to 6 hours of direct sunlight per day in northern zones. The crucial factor, as always with Astilbes, is that the moisture remains steady.) Astilbes can be planted in full shade (defined here as some reflected light but zero hours of direct sunlight per day), but they are unlikely to put on their best performance. Part-shade or dappled shade conditions are optimal.
How To Plant a Potted Astilbe
Dig a hole that is 1½ to 2 times as wide as the plant pot and just deep enough to accommodate the root ball. (Don’t make the hole too deep. When the plant is transferred to the hole, its crown – the point at which the roots meet the stem – should sit at the same level it does when the plant is in its pot.) Add a handful or two of compost and, using your trowel, mix the compost into the soil just as you would combine ingredients in a mixing bowl. By loosening and enriching the soil in this manner, you are creating hospitable conditions for a new plant.
Gently remove the Astilbe from its container. (Do not pull the plant by its leaves or stems. First, check the bottom of the pot for any roots that may have grown through the drainage holes. If they exist, gently tug them to see if they can be straightened. If not, cut them off. Next, invert the pot and knock gently on the bottom to see if the plant slides out. If it doesn’t, slide the blade of a knife around the inside edge of the pot (in much the same way you would separate a cake from a cake pan). If the plant doesn’t yield (some can be stubborn), use sturdy scissors to cut away the pot. Now with plant in hand, use your thumbs to gently loosen or break up the root ball and untangle any roots that may be circling at the bottom. Set the plant in the prepared hole. Backfill with soil and a few more handfuls of compost, and tamp the mixture gently but firmly into place.
Watering: Water your new plant deeply and thoroughly. If you’re not sure how much water to give it, visualize filling a bowl that’s roughly the same size as the pot that housed the plant. If the soil is already moist, less water will be required. If the soil is dry, you may need a bit more. Water your plant deeply — roughly 1” per week until the plant is established.
Mulch: Apply a 2” layer of mulch around the planting area. This will help the soil stay cool and retain moisture, creating ideal conditions for your new plant to settle in and grow.
How To Plant a Bareroot Astilbe
What is a bareroot? It’s exactly what it sounds like: a dormant section of the plant’s roots with little to no top growth. Generally, you want to get your bareroot into the ground as soon as possible upon receipt of your order. If you can’t plant right away, store the bareroot in its package for up to one week in a cool, dark spot such as the basement or bottom of a closet. Do not add water to the packing material.
Rehydrate your bareroot: Roughly 1 hour before planting, unpack your bareroot by gently removing the plastic bag and the packing material (generally damp sawdust or shredded newspaper) that surrounds it. Discard the wrapping materials (you may wish to keep the plant ID tag, if it is also in the bag). Fill a shallow bowl or pan with room-temperature water and soak the bareroot for at least 1 hour (or up to 8 hours) being careful not to submerge any green growth, if evident. (The soaking process rehydrates the bareroot to give it a helpful head start on settling in.)
Dig a hole: While the root is soaking, dig a hole that is wide enough to accommodate the spread of the roots and deep enough to allow you to set the crown — the point at which the stem portion of the bareroot meets the roots — at the depth indicated on the plant label. If leaves are beginning to show, make sure to set your bareroot Astilbe so that the leaves are above the level of the surrounding soil.
Plant your bareroot: Remove the now-rehydrated bareroot from the water and gently fan out the roots. Place the bareroot in the hole, stem side up, and fan out the roots as naturally as possible. (If you’re unable to tell which end is up, position the bareroot sideways. The plant will generally know how to find the surface.) Holding the crown with one hand, backfill the hole with soil, filling in to prevent air pockets. Tamp down the soil firmly but gently around the crown, and then water to eliminate any more air pockets and to provide hydration so your plant can settle in comfortably. (For tips on watering, see Watering note above in How To Plant a Potted Astilbe.)
Mulch: Do not mulch directly over the bareroot planting site and avoid mulching over any sprouted growth that may be peeking above the surface of the soil. Instead, add a 1–2" layer of mulch around the planting site (think of forming a doughnut encircling the spot where the bareroot is buried, leaving a ‘hole’ so the bareroot can poke up its tender shoots without encountering too much resistance). The idea is to use the mulch to retain moisture in the vicinity of the bareroot without smothering your new plant.
Ongoing Astilbe Care
Watering: Astilbes grow best in consistently moist (but not soaking) soil. In the absence of rain, it’s best to water deeply once per week. Resist the temptation to water the plant a little each day. This practice may seem nurturing but it can be detrimental because it fosters shallow rooting. A deep watering encourages plants to send their roots down deep into the soil, which will help reduce watering needs over time and sustain a plant when the weather is dry. When in doubt about the moisture level in the soil, simply stick your finger or a trowel 1” or more into the ground. If the earth is dry, water the plant. Applying mulch is also beneficial because it helps the soil retain moisture.
Fertilizing: You may, if you wish, apply a balanced (15-30-15) fertilizer to your Astilbe plants at the beginning of the growing season each spring.
Pruning/Deadheading: Astilbes don’t need to be pruned or deadheaded because this will not encourage the growth of new flowers. Many gardeners choose to leave the spent flower heads in place to continue to provide interest in the garden.
Pests/Diseases: Among their other remarkable qualities, Astilbes are generally free of insect problems and diseases.
Cut Flowers: Astilbes make an unusual and attractive addition to a cut flower arrangement. For best results, cut the flower stalks when the blooms are only half open.
Frequently Asked Questions
Can Astilbes grow in pots?
Yes, Astilbes make excellent container plants as long as you don’t let them dry out. Choose a generously sized pot and fill it with high-quality potting soil that is designed to hold moisture.
Can Astilbes grow in full sun?
Astilbes can tolerate full sun in northern growing zones where the soil doesn’t dry out in the heat of summer; otherwise, they’re happiest in light or moderate shade.
What is the range of color for Astilbe blossoms?
Astilbe plants are available in a variety of colors and shades, including whites, pinks, reds, and purples.
How tall do Astilbe plants get?
Depending on the variety, mature Astilbes range from 8” to 4’ high (including the plume).
How long do Astilbes bloom?
Astilbes typically bloom for two to three weeks. But different varieties flower at various times. If you choose your varieties carefully for successive blooms, you can design a colorful Astilbe flower display that lasts most of the summer.

