Product Details
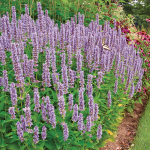
Monarda punctata, an eastern US native, is topped by double-decker whorls of nectar-rich yellow flowers that are tucked between mauve bracts. In addition to being deer-resistant and drought-tolerant in the garden, this fragrant butterfly magnet makes a striking addition to cut flower arrangements. An essential meadow or native garden plant. This flat contains 50 plant plugs, each 2" wide x 5" deep.
This North American genus has several species, all of which share tartly fragrant foliage and the square stems that typify members of the Mint family. The late-summer flower heads are hemispheres of tubular blooms in brilliant colors. Plants thrive in full sun or partial shade and evenly moist soil. Under these conditions, they are vigorous to the point of invasiveness, perhaps past it. Hummingbirds are drawn to the flowers.
Landscape Plugs™ are a boon to gardeners seeking an easy, economical way to plant sizable swaths of native perennials. They are also an affordable way to purchase numerous plants that can be readily incorporated into existing large gardens or meadows. Landscape Plugs™ have deep roots (to 5”), which help plants establish quickly and provide erosion control. This perennial, and others in the Landscape Plugs™ series, is likely to reach flowering size in its first year. By itself or mixed with other plants in the series, it is a superb choice for creating habitat for wildlife. Plugs are offered in easy-to-transport flats, each featuring a single variety. The trays are made of 100% recycled plastic that is recyclable (#6).
For more information on growing and care, click Growing Guide.
Shipping
HOW PLANTS ARE SHIPPED
The size of the plants we ship has been selected to reduce the shock of transplanting. For some, this means a large, bareroot crown. Others cannot travel bareroot or transplant best if grown in containers. We ship these perennials and annuals in 1 pint pots, except as noted. We must point out that many perennials will not bloom the first year after planting, but will the following year, amply rewarding your patience. We ship bulbs as dormant, bare bulbs, sometimes with some wood shavings or moss. Shrubs, Roses, vines, and other woody plants may be shipped bareroot or in pots. The size of the pot is noted in the quick facts for each item.
WHEN WE SHIP
We ship our bulbs and plants at the right time for planting in your area, except as noted, with orders dispatched on a first-come, first-served basis by climate zone. We also ship a wide range of containers and planters, tools, supplies, fertilizers, garden wear, garden decor items, as well as indoor decorations like wreaths and dried bouquets when available. Estimated dates for shipping are indicated in the green Shipping Details box for each item. Please supply a street address for delivery. Kindly contact us with two weeks notice, if you'll be away at the expected time of delivery.
OUR GUARANTEE
We guarantee to ship plants that are in prime condition for growing. If your order is damaged or fails to meet your expectations, we will cheerfully replace or refund it. Please contact our Customer Service Department at 1-800-503-9624 or email us at [email protected]. Please include your order number or customer number when contacting us.
Reviews
There are no reviews yet. Be first to Write a Review.
Growing guide
Planting Your Native Plugs
Soil Preparation:
Below are 3 different methods we recommend for preparing your soil for planting. Choose the method that works best for you.
- Tilling – Plants grow best in soil that has been loosened and cleared before planting. A rototiller comes in handy for preparing a large area, but a shovel or spade can also be used to break the ground, turn the soil, and remove all grass and weeds. Once the area is clear, apply a 3-4” layer of organic matter, such as compost. Turn the layer into the soil to a depth of approximately 6-8”. If you choose the tilling method, continued weeding will be required as your plants start to take root and grow since dormant weed seeds will have been disturbed during the tilling process.
- Mulch & Cardboard - At least a month before planting your garden, lay sheets of cardboard on top of the grass or soil over the entire planting area. Then apply a 3” layer of organic mulch on top of the cardboard. The grass and weeds underneath will decompose over time and form their own compost, which will enrich the soil. Within a few weeks, the cardboard will soften enough to allow you to break through with a trowel and plant into the ground.
- Solarization - This method takes the longest amount of time to prepare your site for planting–up to 8 weeks or longer. Till the ground as described above, and then lay a clear plastic tarp tightly over the area. This will “cook” any grass, weeds, and seeds that remain in the soil. Solarization is the most effective method for weed control, but it may also kill some beneficial organisms in the soil. After the process is complete, though, other organisms will colonize the area.
Planting Your Garden:
Upon Arrival
- Immediately check the soil for dryness. Water your plug trays so the soil is moist.
- Set your plants outside in a sheltered, lightly shaded spot, out of direct sunlight.
- Increase their exposure to sun and wind each day for up to 3 days.
- Make sure the soil remains moist by keeping the plug trays well-watered. The well-rooted plants are susceptible to drying out while in the plug trays.
Planting
- Water thoroughly prior to planting. This will make it easier to remove the plugs from the tray and will keep them from drying out while you are laying out your plants.
- Dig a hole wide enough and just deep enough for the root ball, which will be about 5” deep.
- Remove the plant from the tray and very gently break up the sides of the root ball with your thumbs.
- Set the root ball in the hole so that the top of the root ball is level with the surface of the surrounding soil.
After Planting
- Immediately water plants thoroughly once your garden has been planted, to eliminate air pockets around the roots, and keep an eye on soil moisture over the following weeks. If the soil is dry, water thoroughly. But if the soil below the surface is moist to the touch, don't water. It is better to water deeply and for a longer period of time than providing only brief, shallow waterings, to make sure the roots are getting enough water.
- Apply approximately a 2-4” layer of organic mulch, such as compost, to the area after planting, keeping it from touching plant crowns and stems. The mulch will help suppress weeds, preserve moisture, and enrich the soil over time.
- There is no need to add fertilizer to the soil at this point, or at any time during the growing season.
Continuing Care:
- Plants can be cut back in fall or may be left standing through winter to provide a habitat for overwintering birds.
- Cut back plants in early spring.
- Keep an eye out for developing spring weeds and pull them by hand when they appear.
- Apply a layer of organic mulch in spring. This will help replenish nutrients in the soil and is in lieu of fertilizer.
- Water your garden during prolonged dry spells.

